Guide to using Zoom with ProPresenter
Zoom has become incredibly popular, with many organizations using it for meetings, town halls, worship services, funerals, classroom teaching, and more.
This will give you some tools you didn’t know existed, and walkthrough showing Zoom through ProPresenter to your in-house audience. We’ll also walkthrough sending ProPresenter to Zoom, for presenting to your online audience. Finally, we’ll end with some audio tips to save you some headaches.
Most of the tools use NDI, which is a great way to send video over a network. Read our Beginners Guide to NDI article, here.
Tools
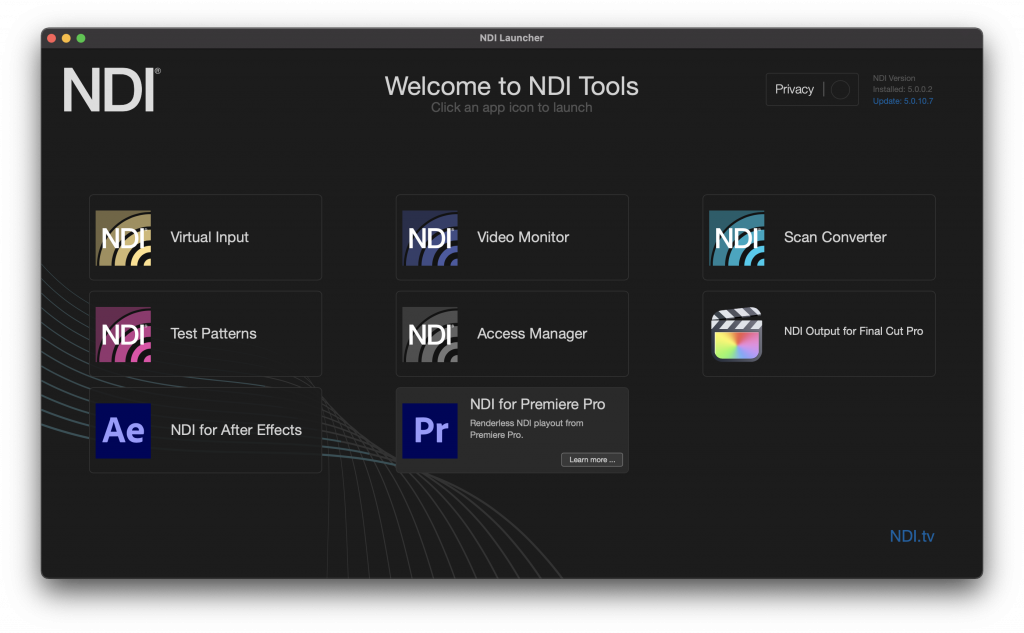
NDI Screen Capture (Windows) / Scan Converter (Mac) – Grabs a screen or a window, and converts it into an NDI feed. Download as part of the NDI Tools pack.
NDI Webcam Input (Windows) / Virtual Input (Mac) – Takes an NDI feed, and converts it into webcam video. Download as part of the NDI Tools pack.
Loopback ($99) – Virtual audio device to send audio between apps, for Mac. Link.
Voicemeeter – Virtual audio device to send audio between apps, for Windows. Link.
AirServer ($50)- if the speaker wants to use Zoom from the stage on an iPad, AirServer lets you capture Zoom into ProPresenter. Link.
ZoomOSC – Control Zoom using Bitfocus Companion. It’s not needed for this tutorial, but as you increase your production skills with Zoom, it becomes very helpful. The free version has lots of features, the paid version unlocks all options. Link.
ZoomISO ($250) – Give individual NDI feeds for every person in the Zoom meeting. While outside of the scope of this article, it’s worth knowing for when you want to increase your production level to switch between multiple peoples’ zoom cameras for your production. Link.
Syphon Virtual Webcam – Takes a Syphon feed and converts it into a webcam. Link. Mac-only, see Notes & Tips below.
Showing Zoom in ProPresenter
- Download and install NDI Tools.
2. Create a test Zoom meeting.
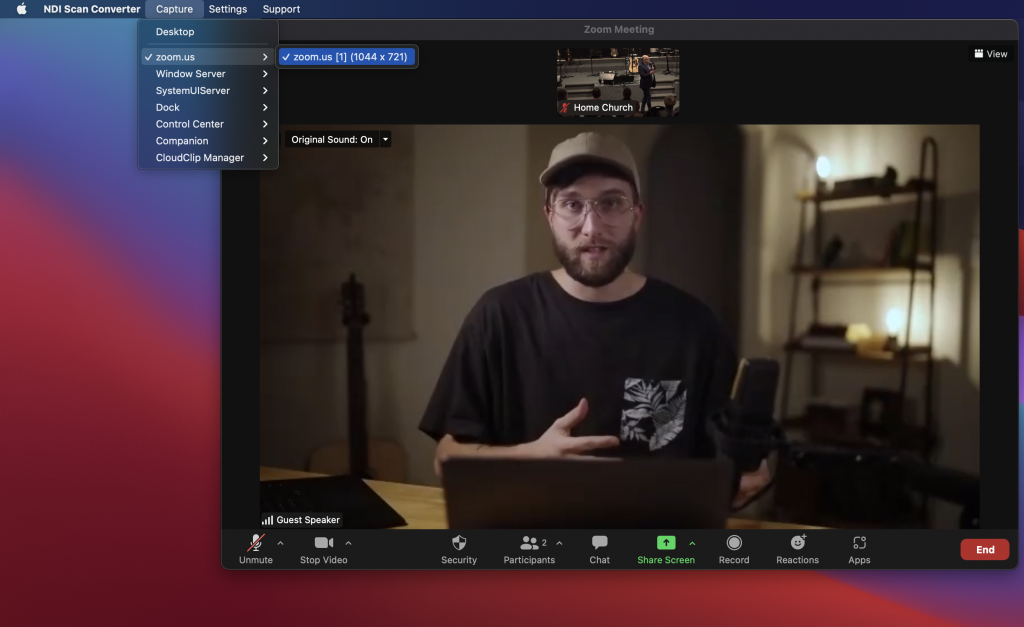
3. Open NDI Screen Capture or Scan Converter.
4. Select the Zoom window.
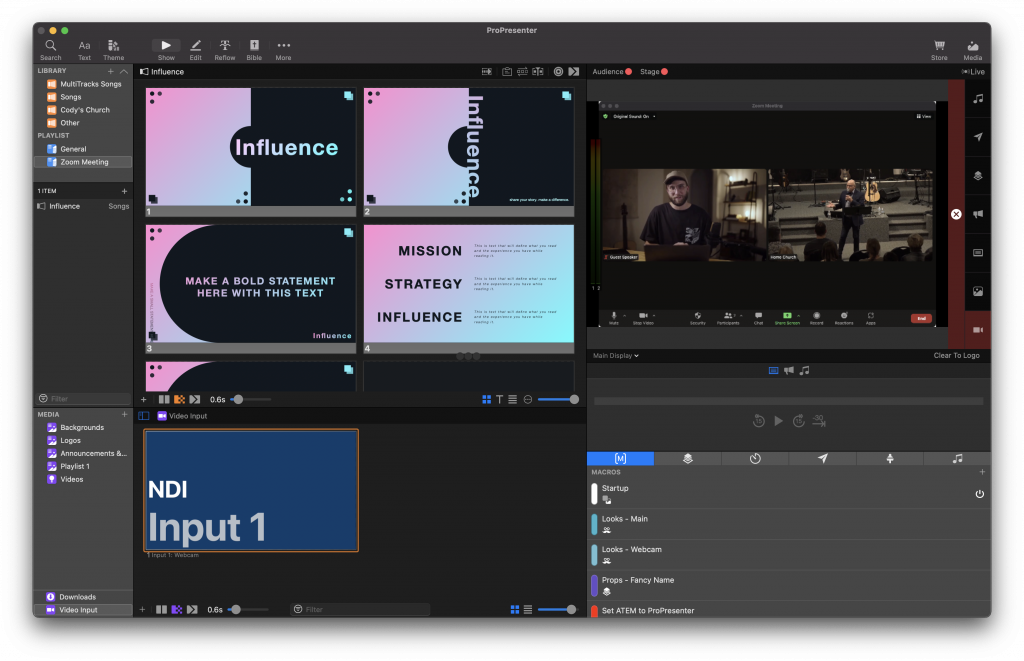
5. Open ProPresenter, and add the NDI Screen Capture as a live input.
File > Preferences > Live Inputs.
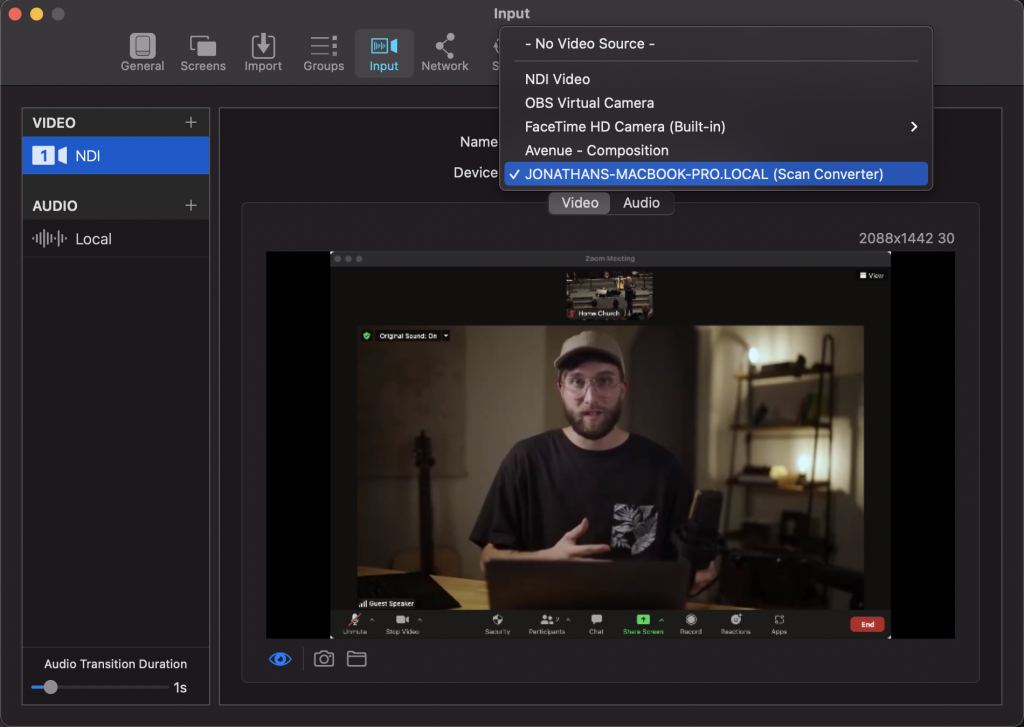
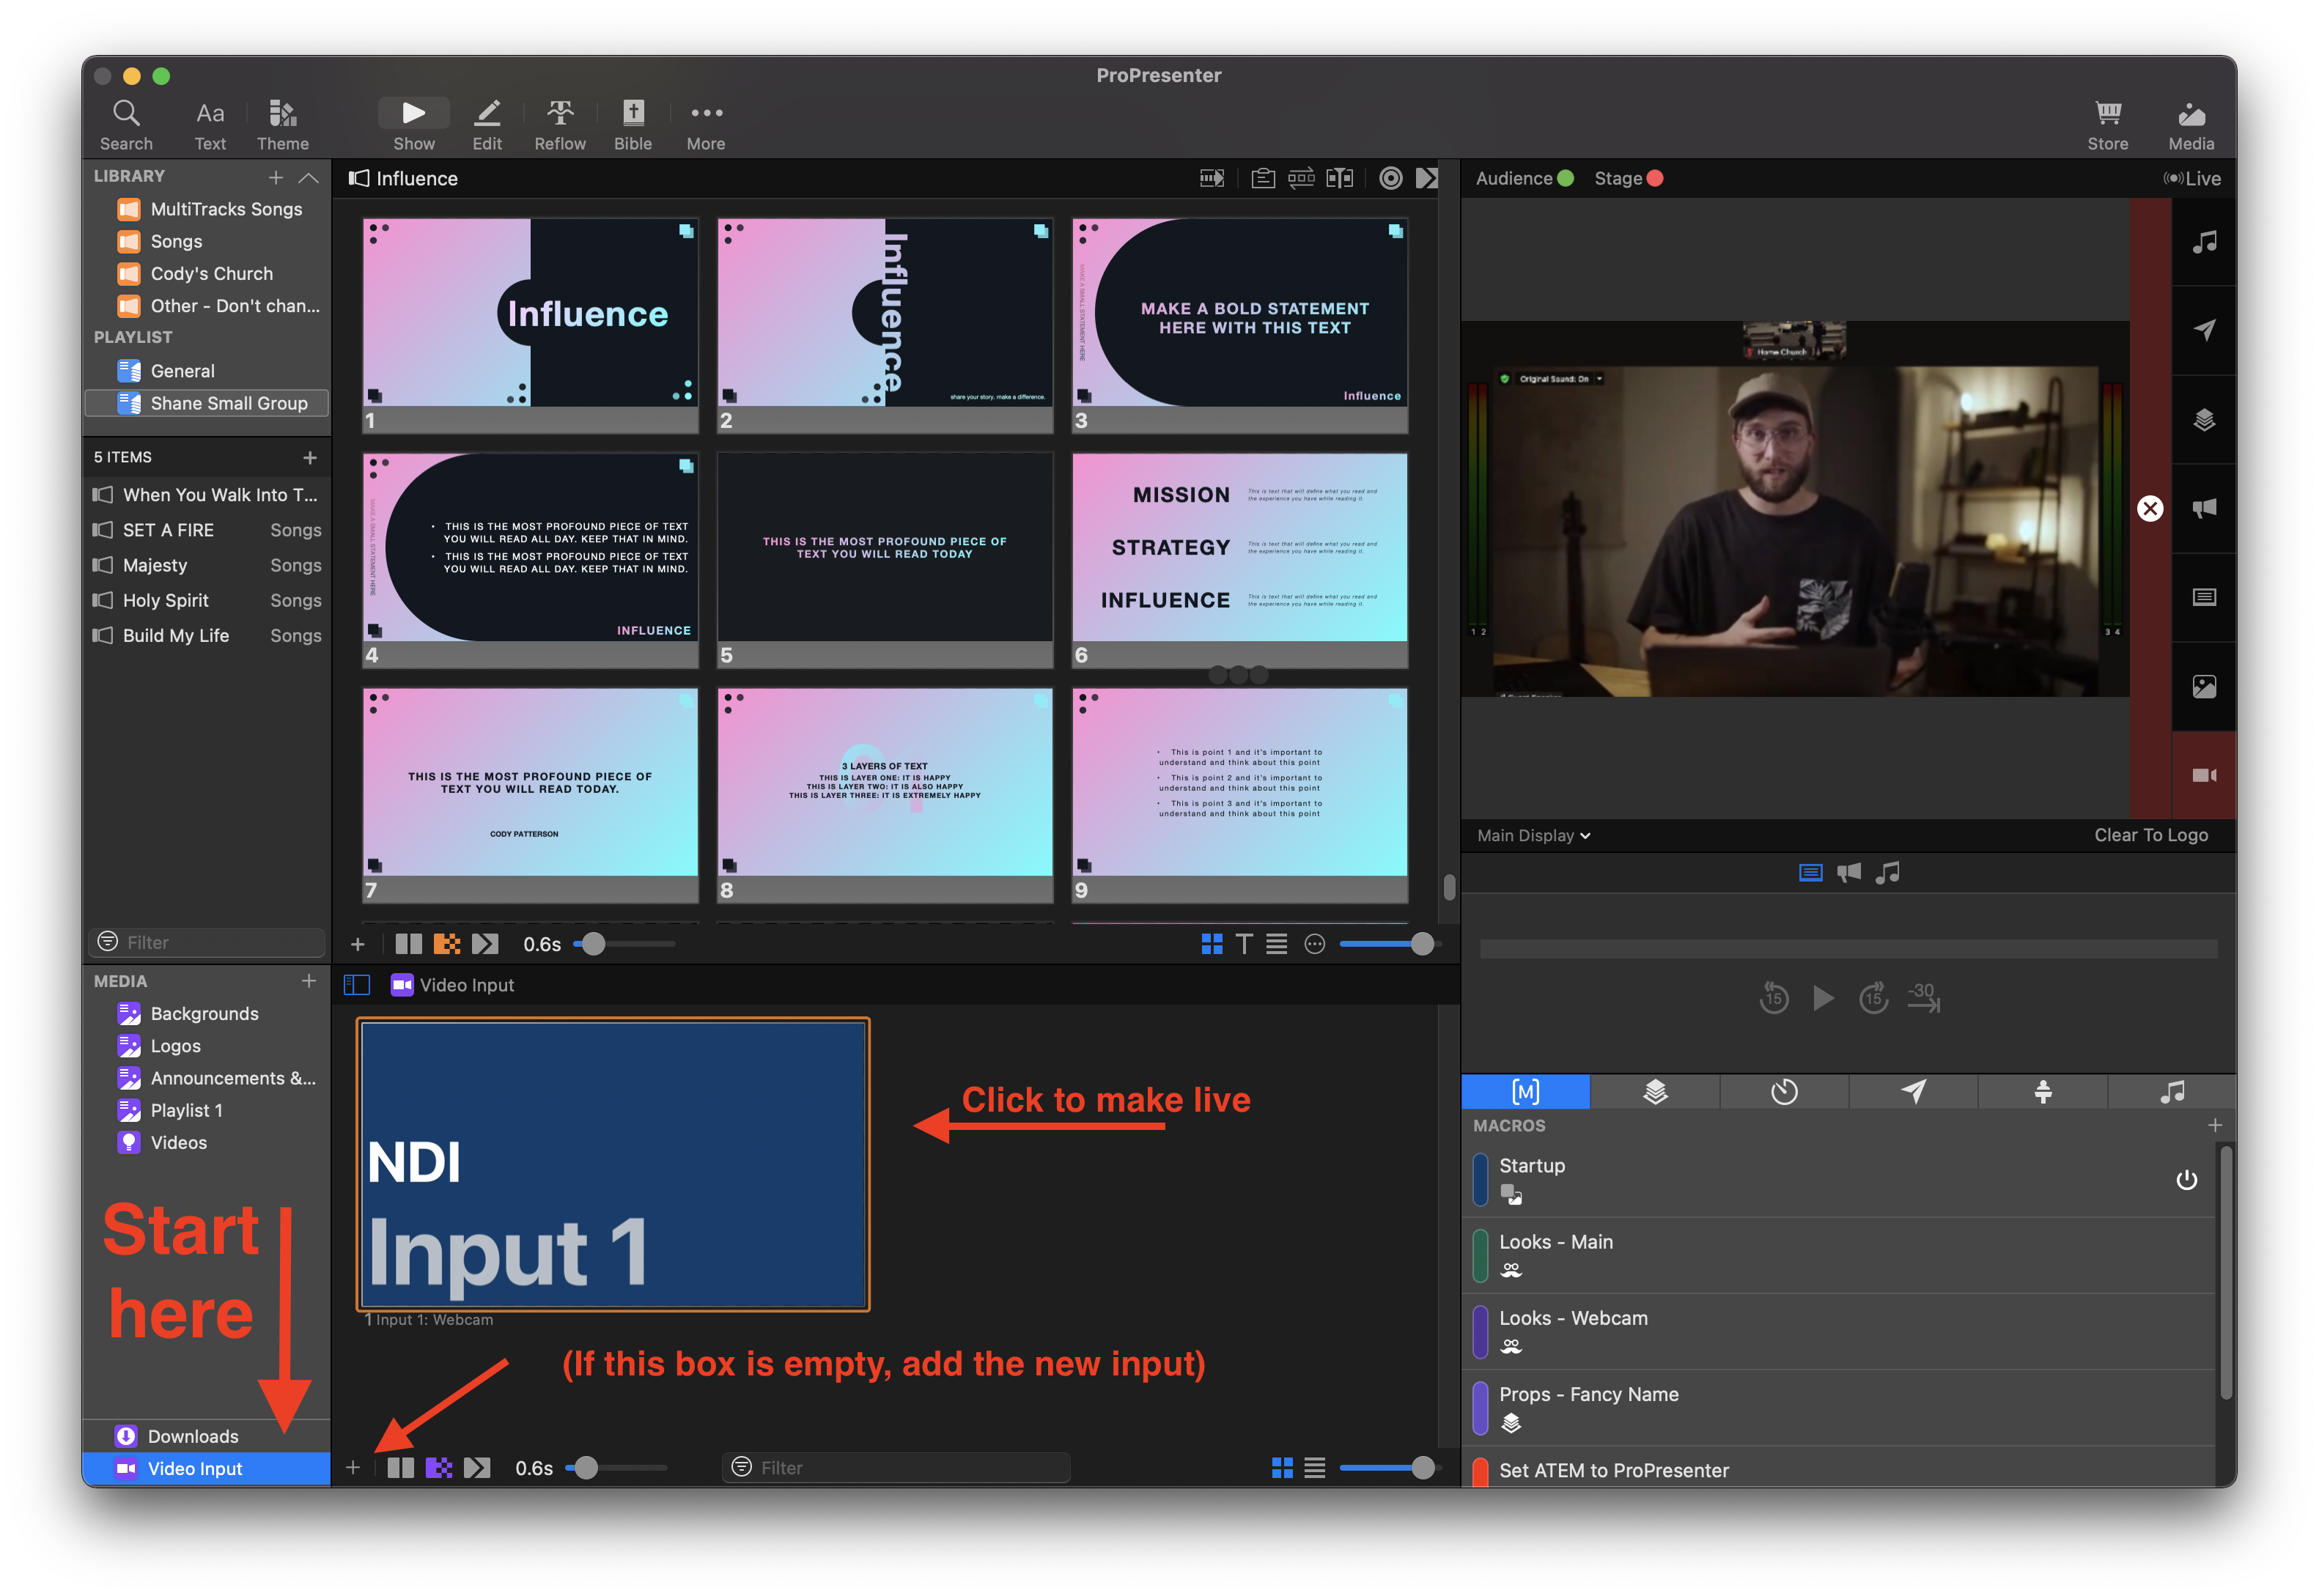
6. Open Video Inputs (lower left, in the Media tab), and click the new input. If it’s not visible, click the little ‘+’ and add it in.
Notes
- The screenshots are from Mac, but it will look the same on PC, except for Screen Capture (read on).
- When you open NDI Scan Converter or NDI Screen Capture, it won’t open a window. On Windows, there will be a little icon in the bottom right to open the menu. On Mac, the options are in the Menu bar.
- To get higher quality video, ask Zoom chat support to upgrade your account to 720p. It doesn’t cost anything, you just need to ask.
- Test everything before the event.
- You can use a second laptop to capture Zoom, and send it into ProPresenter over the network. This is easier and better.
- Using Zoom’s Dual Monitor setting looks more professional, so the audience doesn’t see the chat notifications. Set this in Zoom > File > Preferences > General > checkbox “Use dual monitors”.
- If your leadership wants to use Zoom from an iPad on stage, AirServer can capture the iPad to go into ProPresenter.
- ZoomISO can capture an NDI from each person in the Zoom meeting, if you need more precise options.
Sending ProPresenter into Zoom
- Download and install NDI Tools.
- In ProPresenter, open Menu > Screens > Configure Screens. Create a new NDI output screen.
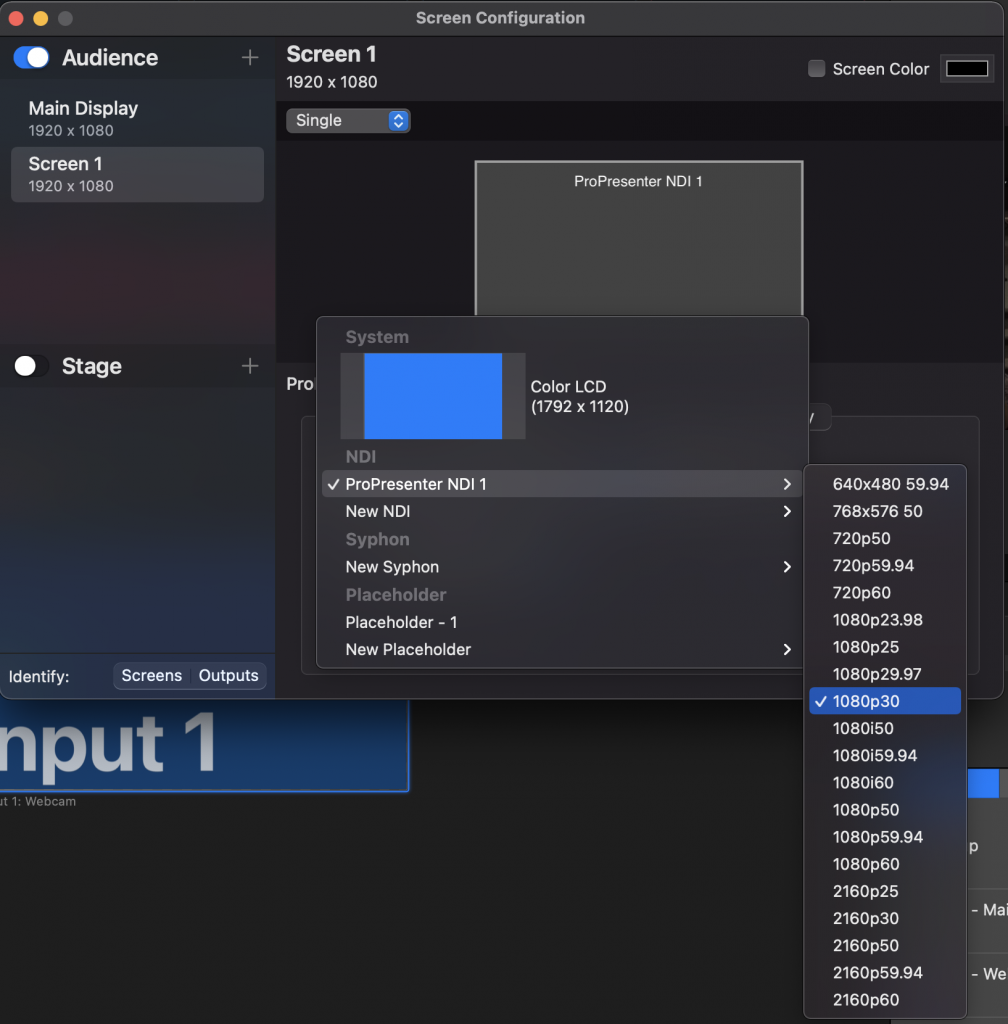
3. Open NDI Virtual Input. It won’t open a window, you control it from the menu bar (Mac) or the toolbar icon (Windows).
4. Set it to the ProPresenter NDI screen.

4. Join the Zoom meeting.
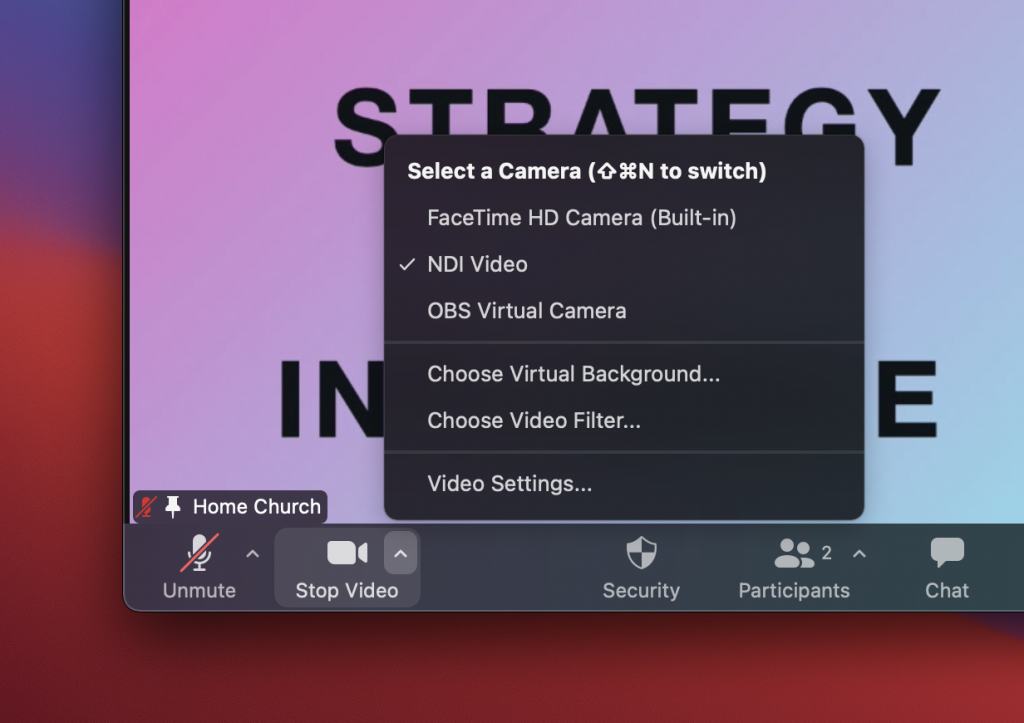
5. Select NDI Video as a Zoom camera.
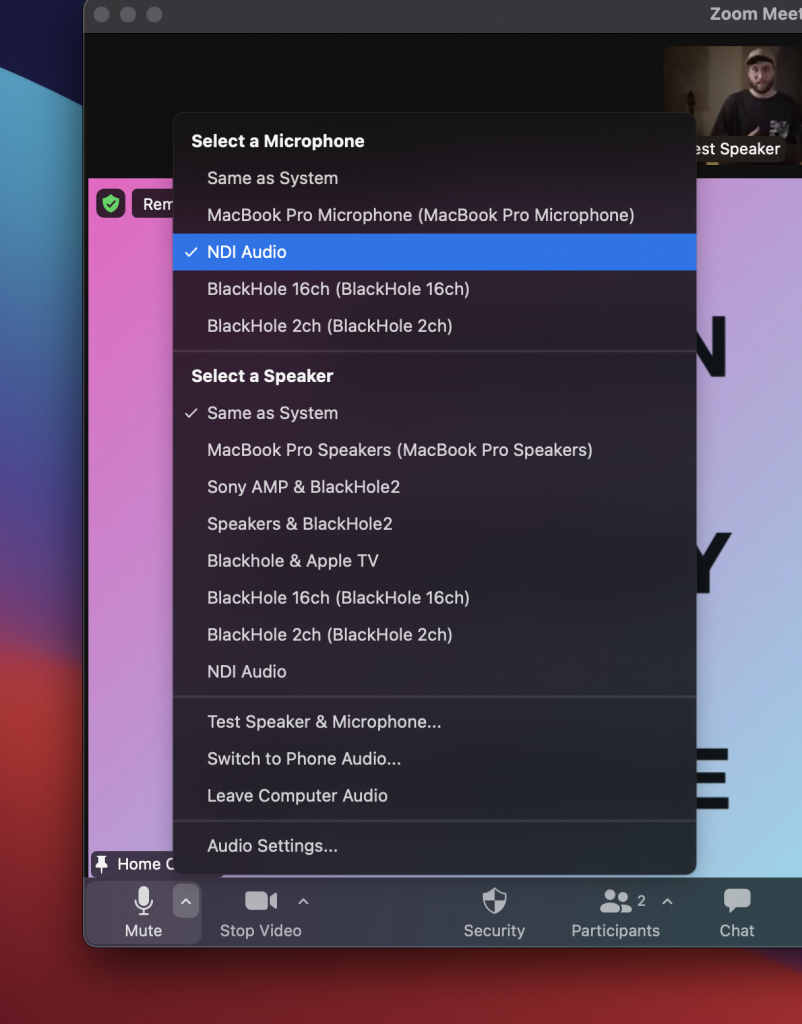
6. If needed, select NDI Audio as the microphone.
Notes & Tips
- If your computer is being overworked, try using Syphon instead of NDI (Mac only). Syphon is faster, uses very little CPU/GPU. It’s Mac-only, and doesn’t send audio, so you’ll need a separate audio device (like Loopback, BlackHole, or VoiceMeeter), to run it. With Syphon, you’ll need to run Zoom and ProPresenter on the same computer.
Don’t Forget about Audio
- Passing audio over NDI is the easiest way to send it from ProPresenter into Zoom.
- Only use 1 computer to send and receive audio. If you use 1 computer to send audio to Zoom, and another to pull audio from Zoom to be heard in-house, it’s easy to get feedback loops.
- If you are using different computer to send/receive audio and video, use a mix-minus in the soundboard to avoid feedback.