Select Page

PVP2

[vc_row full_width=”stretch_row” full_height=”yes” columns_placement=”top” css=”.vc_custom_1475770409325{background-image: url(https://renewedvision.com/wp-content/uploads/2016/06/pvp2_splash.jpg?id=657) !important;background-position: center !important;background-repeat: no-repeat !important;background-size: cover !important;}” el_id=”page-banner”][vc_column][vc_column_text css_animation=”fadeInRight” css=”.vc_custom_1488918096103{margin-top: 100px !important;}”]

Highly Flexible Video Server with Advanced, Multi-screen Mapping Capabilities

[/vc_column_text][/vc_column][/vc_row][vc_row el_id=”overview” el_class=”feature-row”][vc_column][vc_column_text css_animation=”fadeIn”]

What is PVP2?

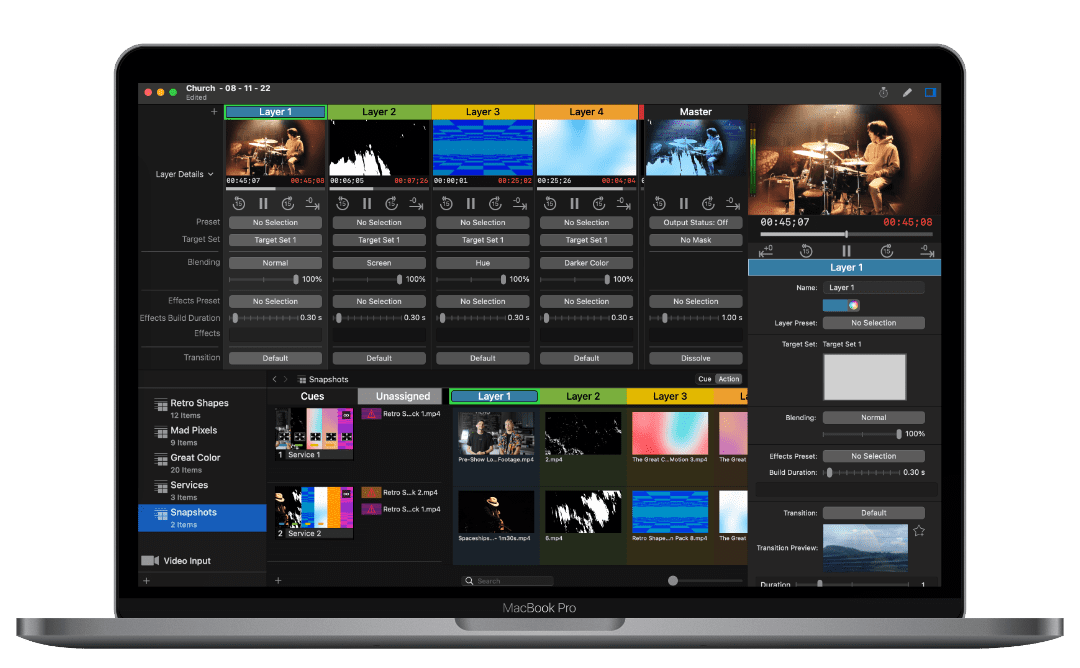
ProVideoPlayerProVideoPlayer 2 (PVP2) is the previous version of the software that remains a great product.  We have it here and are still supporting it because it has a few older features that are not yet supported or have been deprecated in PVP3.  When you buy PVP3 the same license will work for PVP2 until feature parity is ready so this could change in the future.[/vc_column_text][/vc_column][/vc_row][vc_row disable_element=”yes” el_id=”general-enhancements” el_class=”feature-row”][vc_column css_animation=”fadeIn”][vc_column_text css_animation=”fadeIn”]

pvp2-uiGeneral Enhancements

ProVideoPlayer 2 features an all new UI. This interface accommodates all the new features we have announced to make PVP2 the easiest to use and most versatile video staging application on the market.[/vc_column_text][/vc_column][/vc_row][vc_row el_id=”multi-screen” el_class=”feature-row”][vc_column css_animation=”fadeIn”][vc_column_text css_animation=”fadeIn”]

Multiple Screens

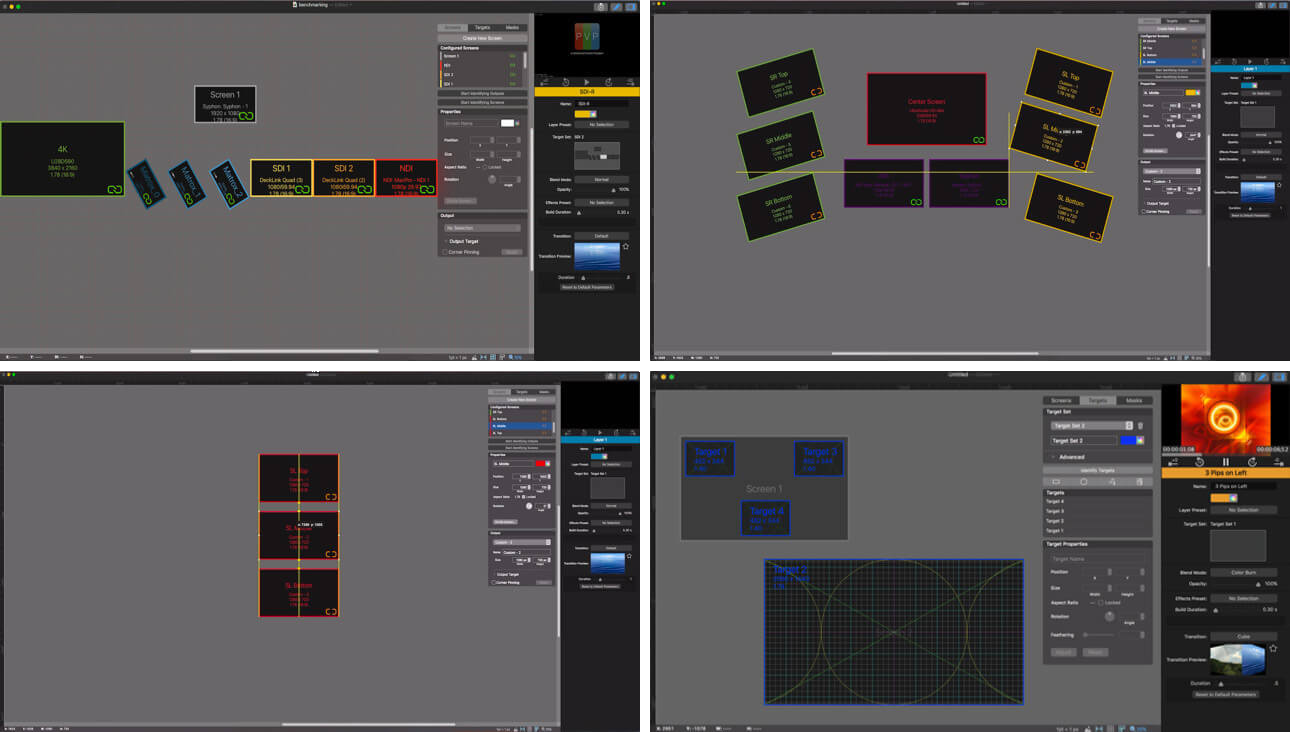
Since its inception, ProVideoPlayer has been used by our customers to create unique, multi-screen presentations using both external graphics modules (such as the Matrox TripleHead2Go) or networking multiple computers over a network and using the powerful network triggering that exists in the software. ProVideoPlayer 2 makes it easier than ever before to create multi-screen presentations from a single computer with support for multiple graphics cards and easy mapping within each graphics card and across multiple cards. What’s more, you can add external graphics processors to each one of these graphics card outputs to give even more screens. You can even add outputs that are not yet connected to a physical output. This allows you to pre-build a show before arriving on site.[/vc_column_text][vc_row_inner][vc_column_inner width=”1/2″][vc_single_image image=”691″ img_size=”full” alignment=”center”][/vc_column_inner][vc_column_inner width=”1/2″][vc_single_image image=”690″ img_size=”full” alignment=”center”][/vc_column_inner][/vc_row_inner][/vc_column][/vc_row][vc_row el_id=”layers-targets” el_class=”feature-row”][vc_column css_animation=”fadeIn”][vc_column_text css_animation=”fadeIn”]

Layers and Targets

Modern multi-display productions often require the use of multiple videos playing in a variety of ways. It is for this reason that PVP2 has support for multiple layers. Layers deliver a level of flexibility to create unique looks and allow the user to take full advantage of the multiple screen functionality in PVP 2. A Layer is merely a video channel, so multiple layers are also great for a single screen environment where layering, textures, or PIPs are desired.

The number of layers allowable is based on the computing power of the hardware on which the software is run, as well as the compression and resolution of the videos used. For example, a current iMac with a 1 GB graphics card can support up to six SD layers, three 720p layers, or two 1080i layers.

To play a video in a layer, you select the layer and click on a video thumbnail from your playlists.

PVP2 Layers

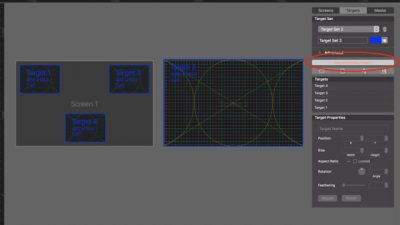
A Render Target is an area that specifies where the layer’s content will be rendered. The same content can be rendered multiple times on multiple render targets within the layer. For example, in the screenshot below, we have a single video being rendered to 3 targets within the layer. In this scenario, this video will play on all 3 connected displays individually.[/vc_column_text][vc_row_inner][vc_column_inner width=”1/2″][vc_single_image image=”702″ img_size=”full” alignment=”center” css_animation=”fadeIn”][vc_column_text css_animation=”fadeIn”]Targets will also account for negative space and overlaps when spanning across multiple outputs, one of many possibilities is shown above.[/vc_column_text][/vc_column_inner][vc_column_inner width=”1/2″][vc_single_image image=”701″ img_size=”full” alignment=”center” css_animation=”fadeIn”][vc_column_text css_animation=”fadeIn”]Layers and Targets provide a great level of flexibility and allow limitless possibilities including PIPs, advanced mapping, and more. A layer with a single render target can also be spanned across multiple targets.[/vc_column_text][/vc_column_inner][/vc_row_inner][/vc_column][/vc_row][vc_row el_id=”transitions” el_class=”feature-row”][vc_column width=”1/3″][vc_column_text css_animation=”fadeIn”]

Transitions

PVP 2 introduces a number of 2D and 3D transitions, along with standard cuts and cross dissolves. These transitions can be set globally, on a per clip basis. The user selects the speed of the transition, which can be changed globally on the fly.[/vc_column_text][/vc_column][vc_column width=”2/3″][vc_single_image image=”709″ img_size=”full” alignment=”center” css_animation=”fadeIn”][vc_single_image image=”708″ img_size=”full” alignment=”center” css_animation=”fadeIn”][/vc_column][/vc_row][vc_row el_id=”mapping” el_class=”feature-row”][vc_column css_animation=”fadeIn”][vc_column_text css_animation=”fadeIn”]

Mapping

Mapping is core functionality for multi-screen environments that is essential yet very intimidating at the same time. PVP2 takes mapping to the masses with its easy UI and WYSIWYG interface for drawing outputs. You can import a JPEG of your CAD drawing of your design or even import a photo of the stage. Drag your displays where they are positioned within the image, and resize them to take their proper relative size vs. other screens. When you span a target across all of your screens, PVP does the scaling for you and your rendered video on each screen is now position properly in real space. This is a great way to account for bezels on video walls, negative space between displays on a stage, overlapping screens, and more.[/vc_column_text][vc_row_inner][vc_column_inner width=”1/2″][vc_single_image image=”712″ img_size=”full” alignment=”center” css_animation=”fadeIn”][/vc_column_inner][vc_column_inner width=”1/2″][vc_single_image image=”711″ img_size=”full” alignment=”center” css_animation=”fadeIn”][/vc_column_inner][/vc_row_inner][vc_row_inner][vc_column_inner][vc_column_text css_animation=”fadeIn”]The advanced user can also get into a more detail if desired by double clicking on a render target and selecting source coordinates from the video. You can then place your targets where you would like this with pixel accurate precision. In this view you can also import an image (photograph, drawing, etc) to make source coordinate selection more precise.[/vc_column_text][vc_single_image image=”716″ img_size=”full” alignment=”center” css_animation=”fadeIn”][/vc_column_inner][/vc_row_inner][vc_row_inner disable_element=”yes”][vc_column_inner][vc_column_text css_animation=”fadeIn”]

InfoComm Preview of ProVideoPlayer 2 mapping by Church Tech Weekly

[/vc_column_text][vc_video link=”https://player.vimeo.com/video/68970532″ el_width=”80″ align=”center” css_animation=”fadeIn”][/vc_column_inner][/vc_row_inner][/vc_column][/vc_row][vc_row el_id=”networking-content-management” el_class=”feature-row”][vc_column css_animation=”fadeIn”][vc_column_text css_animation=”fadeIn”]

PVP2 NetworkingNetworking / Content Management

Many ProVideoPlayer users only need a single computer to drive their single screen set ups. With PVP 2, additional graphics cards will greatly expand that functionality, however, for large projects a single machine is not capable of delivering the number of pixels you desire.

PVP allows you to network multiple machines together and will deliver frame accurate playback across multiple machines. You can view the network connection status in real time in the network panel.

The most exciting new addition to networking is the ability to push content from the Master machine to the Slave machines. Content includes actual video files, playlists, folders, and even output position, layers, and targets.

This means you can set up your 20 outputs on the master machine, set their position relative to each other, drop in your layers and targets, push your content across the network, assign outputs and be up and running in no time. Never before have multi-screen presentations been so easy![/vc_column_text][/vc_column][/vc_row][vc_row el_class=”feature-row” el_id=”tabbed-slave”][vc_column][vc_column_text css_animation=”fadeIn”]

PVP2 Slave ControlTabbed Slave Control

While networking multiple machines together for synced playback over a network is an incredibly powerful feature, managing content across multiple machines has been a cumbersome process. Tabbed Viewing changes all of this and revolutionizes your multi-computer workflow. You can view Slave machines as a tab on the Master and move content, arrange playlists, trigger clips, clear layers and more all from the Master. This tabbed viewing of slaves makes managing multiple computer set ups easier than ever.[/vc_column_text][/vc_column][/vc_row][vc_row el_class=”feature-row” el_id=”macros”][vc_column][vc_column_text css_animation=”fadeIn”]

Macros

PVP2 Macro 2 PVP2 Macro 1The addition of Layers may leave you wishing your mouse could be in two places at once. Macros allow you to trigger different clips on different layers at the same time. Once you create a macro, just drag and drop the thumbnail for each video you want to be part of that Macro. Select a layer for the video, set your transition and transition duration, and you are good to go. Multiple video clips triggered with a single mouse click–that’s Macros.[/vc_column_text][/vc_column][/vc_row][vc_row el_class=”feature-row” el_id=”masks”][vc_column][vc_column_text css_animation=”fadeIn”]

Masks

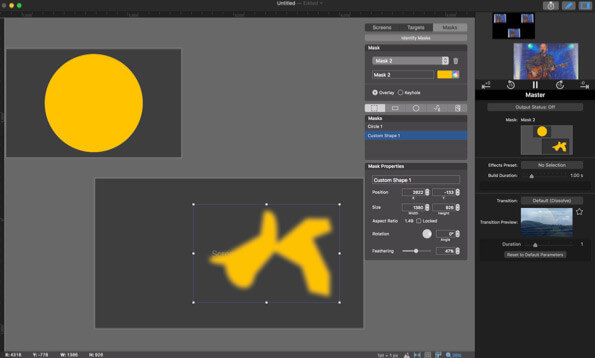
Yes–PVP 2 has Masking! Many users have made great use of the mask layer in ProPresenter and it has been one of the most requested features in PVP 2. We have built an incredible mask drawing tool that allows you to create custom paths with bezier curves for the mask utilizing similar methodology as many drawing programs. You can use the square and circle tool for common shapes as well. Multiple masks can be created and each mask has its own key and fill setting. To add the final bit of functionality, each mask can be set to operate as a Keyhole Mask or Overlay Mask.[/vc_column_text][vc_row_inner][vc_column_inner width=”1/2″][vc_single_image image=”739″ img_size=”full” alignment=”center” css_animation=”fadeIn”][vc_column_text css_animation=”fadeIn”]

Here’s an example of an overlay mask

[/vc_column_text][/vc_column_inner][vc_column_inner width=”1/2″][vc_single_image image=”738″ img_size=”full” alignment=”center” css_animation=”fadeIn”][vc_column_text css_animation=”fadeIn”]

Here’s an example of a keyhole mask

[/vc_column_text][/vc_column_inner][/vc_row_inner][/vc_column][/vc_row][vc_row el_id=”hot-folders” el_class=”feature-row”][vc_column][vc_column_text]

Hot Folders

Many times, content is provided for an event on a “just in time” basis. You don’t receive the content until minutes before a show, or even during the performance. Wouldn’t it be great if you need not have to leave the ProVideoPlayer interface to access newly loaded content? Now you can dynamically create playlists from a folder, with live updating. When you add content to that folder, it automatically appears in the playlist. Share a folder over a network and as content is added, it is put in the playlist — ready for immediate playback.[/vc_column_text][vc_single_image image=”740″ img_size=”large” alignment=”center”][/vc_column][/vc_row][vc_row el_class=”feature-row” el_id=”go-to-loop-x”][vc_column][vc_column_text css_animation=”fadeIn”]

Go to X / Loop for X

Many projects (whether it be live productions, broadcast applications, or digital signage applications) require more advanced clip playback behavior than simply looping, stopping at the end, or going to the next clip. In ProVideoPlayer 2 you get a bevy of new capabilities including:

  • Loop a clip a specific number of times before going to the next cue
  • Loop a clip for a certain period of time before going to the next cue
  • Go to any cue in your playlist when a clip is finished playing

[/vc_column_text][vc_single_image image=”742″ img_size=”large” alignment=”center” css_animation=”fadeIn”][vc_column_text css_animation=”fadeIn”]This new logic provides the ability to set up a series of cues that can be run without user interaction. Combined with the scheduling capabilities in ProVideoPlayer, the options for playing what you want when you want it are limitless.[/vc_column_text][vc_single_image image=”741″ img_size=”large” alignment=”center” css_animation=”fadeIn”][/vc_column][/vc_row][vc_row el_class=”feature-row” el_id=”effects”][vc_column][vc_column_text css_animation=”fadeIn”]

PVP2 EffectsEffects

The effects capabilities have grown significantly since the original PVP. There is a larger set of options to choose from and these effects can be combined with one another to create more advanced looks. Each effect has it’s own associated set of parameters for selection and adjustment.

As always, these settings can be saved on a per instance basis. So one clip can have multiple versions of itself despite only existing once on the hard drive.

[/vc_column_text][/vc_column][/vc_row][vc_row el_class=”feature-row” el_id=”key-mapping”][vc_column][vc_column_text css_animation=”fadeIn”]

PVP2 Key MappingKey Mapping

Many operators need to trigger things quickly or repetitively. Key Mapping allows you to easily program actions to be triggered via a keystroke instead of a mouse click. You can map a key to a layer, folder, playlist, media item or clear command. This allows you to quickly call up any video clip in any playlist on any layer. It is also a great way to bail to a logo or go black on all screens.[/vc_column_text][/vc_column][/vc_row][vc_row el_class=”feature-row” el_id=”scheduler”][vc_column][vc_column_text css_animation=”fadeIn”]

PVP2 Scheduler

Scheduler

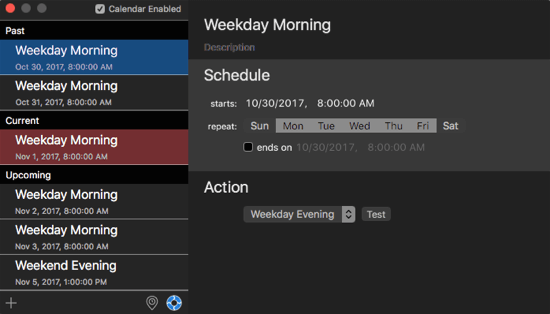
PVP 2’s robust scheduler makes it a fantastic tool for digital signage, digital menus, and creative permanent video installs.

A schedule is a 24-hour period of time (midnight to midnight) and is a collection of actions for the day. Actions are triggers for cues at specific times. An event is a date and time to change the active schedule.

Once a schedule is active, it repeats every day until an event changes the active schedule.[/vc_column_text][/vc_column][/vc_row][vc_row el_class=”feature-row” el_id=”syphon”][vc_column css_animation=”fadeIn”][vc_column_text]

Syphon

We have attempted to build a tremendous amount of power and flexibility in ProVideoPlayer 2, but we recognize that often there are specific needs that we can’t accommodate in our software directly. That’s why ProVideoPlayer has implemented Syphon support. Syphon is an open-source protocol that allows us to share our graphics output with other programs that can take these images and manipulate them directly… all on the same computer. You can choose from any one of your screen outputs of PVP as a socket for use by other Syphon-enabled applications.[/vc_column_text][vc_single_image image=”779″ img_size=”large” alignment=”center”][vc_column_text]Here is how it looks in an application that supports Syphon input (MadMapper):[/vc_column_text][vc_single_image image=”778″ img_size=”large” alignment=”center”][/vc_column][/vc_row][vc_row el_class=”feature-row” el_id=”sub-screens”][vc_column css_animation=”fadeIn”][vc_column_text]

Sub-screens

We have created the ability to create sub-displays from any of PVP’s outputs. For example, you can treat each of the three outputs of a TripleHead2Go as a separate display in your show layout, moving them to different locations within a pixel space to make mapping easy. If you are using displays/projectors with simple wall mapping capabilities built in, you can treat each subsection of the output signal as its own screen, making the creation of scalable pixel spaces easy and cost effective.[/vc_column_text][vc_row_inner][vc_column_inner width=”1/2″][vc_single_image image=”781″ img_size=”full” alignment=”center”][/vc_column_inner][vc_column_inner width=”1/2″][vc_single_image image=”780″ img_size=”full” alignment=”center”][/vc_column_inner][/vc_row_inner][/vc_column][/vc_row][vc_row el_class=”feature-row” el_id=”edge-blending”][vc_column][vc_column_text]

Edge Blending

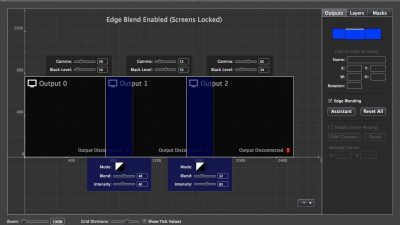
ProVideoPlayer has a powerful new edge-blending engine that makes it easy to use 2 or more projectors to create a seamless large screen image, vertically or horizontally. Using the built-in wizard, enter in the dimensions of the screen and the resolution of each of the projectors and ProVideoPlayer does the rest. Advanced users can bypass the wizard and overlap to outputs freestyle or by entering coordinates and turning on the blend for the overlap. The Edge Blending functionality can be used with projectors connected to individual outputs of a computer, or with external image splitters such as the Matrox TripleHead2Go. Adjustments can be made to fine-tune the image by adjusting the each blend’s gamma curve, width, and intensity, and the gamma and black-levels of the non-edge blended areas can also be set to correct for black bleeds and white levels.[/vc_column_text][vc_row_inner][vc_column_inner width=”1/2″][vc_single_image image=”784″ img_size=”full” alignment=”center”][/vc_column_inner][vc_column_inner width=”1/2″][vc_single_image image=”783″ img_size=”full” alignment=”center”][/vc_column_inner][/vc_row_inner][vc_column_text]When finished with the Wizard, PVP displays the blended area of the screens where adjustments can be made to optimize the blend if necessary.[/vc_column_text][vc_single_image image=”1135″ img_size=”full” alignment=”center” css_animation=”fadeIn”][/vc_column][/vc_row][vc_row el_class=”feature-row”][vc_column][vc_column_text css_animation=”fadeIn”]

PVP2 Quick Preview

Quick Preview

A picture may be worth a thousand words, but a thumbnail image doesn’t always communicate everything you want to know about a video clip. For this reason PVP2 offers a new “quick preview”. By option-clicking on any clip in your library, you can see what that clip looks like within the thumbnail view, without having to open the media properties or otherwise take your mind off the task at hand.[/vc_column_text][/vc_column][/vc_row][vc_row el_class=”feature-row”][vc_column][vc_column_text css_animation=”fadeIn”]

Live Video

ProVideoPlayer’s powerful effects, transitions, layers, and mapping need not be relegated to video files. With support for multiple inputs (Blackmagic Decklink, Intensity, and UltraStudio devices through PCIe, Thunderbolt, and USB3) and low latency, live video can be mapped to individual layers giving you extraordinary flexibility for corporate events, concerts, and houses of worship.[/vc_column_text][/vc_column][/vc_row][vc_row el_class=”feature-row”][vc_column][vc_column_text css_animation=”fadeIn”]

Effect Sets / Effects Cues

We were so excited to add more effects to ProVideoPlayer 2, but with so many effects available and combinations therein, we ran into a problem: Often we wanted to apply the same settings of the same effects to multiple clips… or to save them for quick access.

It is for this reason that we created effect sets — a user defined selection of active effects. Once created, these effect sets and the the settings therein can be applied to any media cue with a simple drag-and-drop to one or more media cue thumbnails. When the clip is selected, it will be played with the combination of effects specified by the set.

Want a given look for all of you clips without effecting the original cues? Set the effect set as global and every clip played will have the same collection of effects applied.[/vc_column_text][/vc_column][/vc_row][vc_row el_class=”feature-row”][vc_column][vc_column_text css_animation=”fadeIn”]

Corner Pinning

ProVideoPlayer 2 was designed from the beginning to create unorthodox visual experiences with a variety of displays. With that endeavor, however, you may find yourself with the inability to set projectors at just the right angle. PVP2’s built in corner pinning functionality allows you to adjust for these inevitabilities with an easy to use visual interface that lets the 4 corners of the visual output be adjusted such that the projected output can fit the screen… regardless of the projected area.[/vc_column_text][/vc_column][/vc_row][vc_row el_class=”feature-row”][vc_column][vc_column_text css_animation=”fadeIn”]

Looks

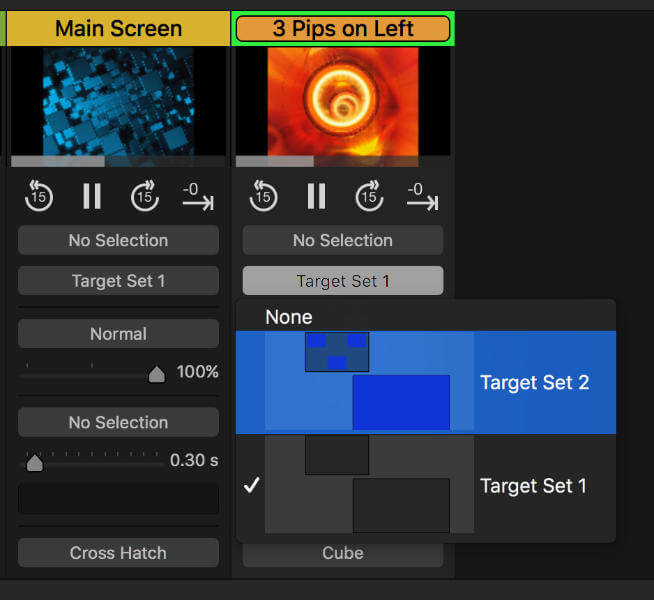
When we look to add video elements to a project design, we start with the design itself… where displays are going to be placed, and the different ways that video will be shown on those displays. These various settings are colloquially called “Looks”. Sometimes, you may want different content on each display, other times you want the same content spread out across all displays.

The advanced mapping features of ProVideoPlayer 2 allow you to design different layouts per layer of the software called “target sets”, and you can specify what set is active on each layer at the same time with PVP 2’s “Looks” feature. This readily available drop down menu gives you quick access to change the entire “Look” of your project and how video is mapped across all displays.[/vc_column_text][/vc_column][/vc_row][vc_row el_class=”feature-row”][vc_column][vc_column_text css_animation=”fadeIn”]

Playlist Export

It takes a lot of time to curate, organize, and manage media, and it is important that those efforts be easily saved and transferred from one machine to another. In ProVideoPlayer 2, you can export one or more playlists, with the option to include the media within the exported document.

When opened on a separate PVP2 machine, the playlist will be imported and any included content copied to the default directory. Note also that each clip within the playlist retains its effects and transitions cues.[/vc_column_text][/vc_column][/vc_row][vc_row el_class=”feature-row”][vc_column][vc_column_text css_animation=”fadeIn”]

Communications (Serial and DMX)

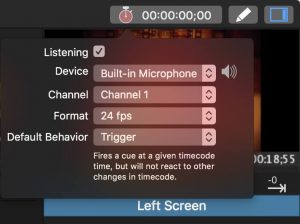
Clearly, ProVideoPlayer 2 was designed for a wide variety of applications… from fixed displays to live events, there are a great many tools to fit a great many video playback and mapping designs. We recognize that PVP is usually part of a larger puzzle and as such we have added the ability to control cues within ProVideoPlayer 2 through switcher standard protocols (AMP and VDCP), Lighting protocols (DMX over Artnet), or MIDI.[/vc_column_text][vc_single_image image=”1150″ img_size=”large” alignment=”center” css_animation=”fadeIn”][vc_row_inner][vc_column_inner width=”1/2″][vc_single_image image=”1151″ img_size=”large” add_caption=”yes” alignment=”center” css_animation=”fadeIn”][/vc_column_inner][vc_column_inner width=”1/2″][vc_single_image image=”1152″ img_size=”large” add_caption=”yes” alignment=”center” css_animation=”fadeIn”][/vc_column_inner][/vc_row_inner][/vc_column][/vc_row][vc_row el_class=”feature-row”][vc_column][vc_column_text css_animation=”fadeIn”]

PVP2 Manual Mode

Manual Mode

While ProVideoPlayer 2 has a myriad of ways to set up cues to manipulate a collection of screens and visuals at the touch of a button, there are times when you want more control over the transitions that occur between videos.

This kind of control lets you adjust manually the blend between the current and destination videos on each layer individually.

[/vc_column_text][/vc_column][/vc_row][vc_row el_class=”feature-row”][vc_column][vc_column_text css_animation=”fadeIn”]

CITP Thumbnails

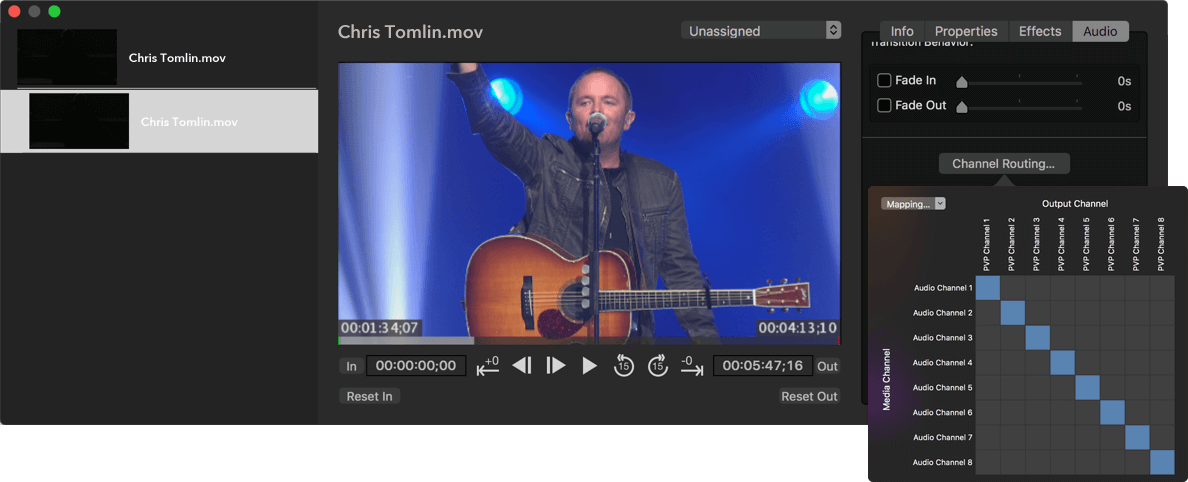
WhileCITP (Controller Interface Transfer Protocol) is a means by which modern lighting consoles can communicate to ProVideoPlayer and retrieve thumbnails of the video cues that exist within the product, making it easy for lighting designers to cue specific videos over Artnet.

[/vc_column_text][/vc_column][/vc_row][vc_row el_class=”feature-row”][vc_column][vc_column_text css_animation=”fadeIn”]

Cues for Masks and Looks

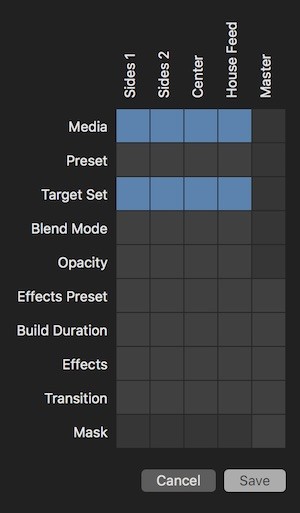
In addition to creating cues for playing one or more videos on multiple layers and changing effects sets, you can also set up cues to change masks or the mapping of videos when a specific video cue is selected. This gives you the ability to pre-set a number of different changes to occur with the touch of a button.

[/vc_column_text][vc_row_inner][vc_column_inner width=”1/2″][vc_single_image image=”1157″ img_size=”full” add_caption=”yes” alignment=”center” css_animation=”fadeIn”][/vc_column_inner][vc_column_inner width=”1/2″][vc_single_image image=”1158″ img_size=”full” add_caption=”yes” alignment=”center” css_animation=”fadeIn”][/vc_column_inner][/vc_row_inner][/vc_column][/vc_row]