
Video Transcription
In this video, we’re going to take a look at how to stream to your website, Facebook, and YouTube, all at the same time using ProPresenter and Resi’s web platform. Now, Resi’s platform will take a single video source from ProPresenter and convert it to multiple bit rates in the Cloud, along with sending your video to Facebook, YouTube, and other destinations at the same time. This means you can have the highest quality stream with the lowest bandwidth requirements, all using your current computers. To get started, let’s go to ProPresenter > Preferences, and then let’s select Resi.
Here you’ll see we’re on the Resi tab inside of our Preferences, and they have more information about what Resi provides. And if you click on more info, it’ll bring you to a page where we can sign up for one of their multiple different plans that they have available. Now, you can do things like streaming just to YouTube and Facebook, or you could stream to your website and an app and YouTube and Facebook all at the same time. So they have a lot of different options available.
Now, I’ve already set up my account, so I’m going tosimply log in. Now, once we’re logged in, it’s going to ask us to register thisdevice as an encoder for Resi and give it a name, because with Resi, you canactually have multiple hardware encoders or software encoders usingProPresenter. So we need to name this specific machine so we know which one isactually sending a stream to Resi. So I’m just going to name this one Brad’siMac ProPresenter, and then we’re going to select register. You can now seethat our account has been registered, and our encoder is set up and we can seewhat version it is.
From here, we can open our Capture Settings, or we could close this out and just go to our Live button and click on Capture Settings. The first setting we need to make sure we have set up is what is the source of our stream, so which screen do we want to send to Resi? So I have a screen that I’ve named ‘live stream’. It’s actually a Stage Screen called ‘live stream’ that just has a video input always showing on it. So I’m going to select that screen. My destination is Resi. I could give this an event name if I wanted to, and then I need to select a destination group that we’ll go over in just a minute. I’m going to choose the default destination group, and then I can choose my resolution. So I can go in here and send out maybe a 1080p60 stream at six megabits per second.
And I could adjust my audio routing so I can choose which ProPresenter audio channels I want to send, and then we could go back to our Resi Preferences and we can start streaming. Now, before we actually start streaming, let’s take a look at the Resi control panel. Now, the first thing that we’ll see inside the Resi control panel is our encoders. So you can see here Brad’s iMac ProPresenter, and it’s actually got a label of ProPresenter here saying that this is a ProPresenter encoder. And then we can see the different profiles. So we have an encoder profile and an event profile, and we can actually start that encoder to start streaming right from here.
The next thing that we have is our events. Now, there aretwo different types of events. We have encoder events and web events. Andencoder event is when our encoder, ProPresenter, is sending video to the Cloud,to Resi’s Cloud. And that’s the raw, original, highest quality version, andthat’s an encoder event. And so this is a list of all the different tests thatI’ve been running, and those are all the different encoder events. Below thereare our web events, and a web event is when the encoder takes your stream andthen encodes it and sends it out to different web destinations.
And those web destinations can be things like a videoplayer on your website. It could be to an app. It could be to Facebook orYouTube, to different social media destinations. And those are all of your webevents. Now, those destinations are all set up through destination groups. Soif we click on destination groups, you’ll see I have a default destinationgroup. And I can go over here and I can edit this destination group, and you’llsee that currently it’s being sent to the web event profile, and then it’s alsostreaming to different social media destinations. Currently, I have it set to anew unlisted broadcast just to my personal YouTube account, but I could set upand add a different YouTube account or a Facebook account.
You can only send to a single YouTube or Facebook accountat one time. And then every time we start a stream, we can have it go to thatgroup of destinations. So if you wanted to stream out to your website and toFacebook and YouTube, that could be a destination group. But let’s say you hadanother event that you didn’t want to send out to social media, you only wantedit to go out to your website, you could create a destination group that is justyour website and includes no social media. So you could set up a differentdestination group for that. Now, to add it in new social media destinations, wecan either click this button or we can go to social media and add differentaccounts.
You’ll see that I have multiple YouTube accounts set uphere, but again, we can only use one at a time, and we can easily add in newFacebook accounts. You’ll also see some other options here on the left. Thenext one is encoding profiles, which is actually overwritten by ProPresenter.So ProPresenter is sending an encoding profile, so you don’t really need toworry about this if you’re using ProPresenter to encode your video. Next, wehave our event profiles. Now, an easy way to think of event profiles is totreat them as separate types of events. So for churches, we would have Sundaymornings, and that would be one type of event, but we might also stream a youthservice on a different night of the week, and that would be a different type ofevent.
Now, each type of event, when we go over to our web eventprofile and we go over to actions and we hit details, in here you’ll see thatyou get your embed code to use for a website, or there’s a standalone player,which is just a webpage with this embed code already on it. But most of thetime, you’re going to want to use this embed code to show your video player onyour website or Church Online Platform, or whatever final destination that youwant to show that video player on, this is where you would get that embed code.
Now, this is only included in plans that allow you to havethis sort of player. For social only plans, you won’t get this embed codeoption. And so this would be the web event profile for my single event, likeSunday morning. But if I wanted to have a different embed code for maybe ayouth website, I would need to add a new web event profile, and now that webevent would have its own video player that you could use over and over for thatevent type. We also have the option for venues and users. The main thing hereis that you can add different users to have access to your Resi control panel.
And then finally, we have an area where we can add in different contacts, and these contacts will get alerted for different things like billing or streaming alerts if there’s an issue with your stream, so you can name them in here. These might be the same people that you have listed in your user area, but these are going to get contacted automatically about streaming issues or billing issues. Finally, we can go up to Scheduling, and in here we can actually schedule events to happen, so we can actually automate our streaming encoder to who start in ProPresenter and to start a web stream for us. So we could go to Schedule Event and hit Live Schedule, and then in here we could give a schedule description and we could choose which encoder we’re using, which event profile we’re using, set a date and time, and then we can add in our web event and have that all start for us automatically so our stream starts when we want it to.:
So now let’s go back inside ProPresenter, and we’re going to view our live stream screen, and now let’s select some content to send out to that screen. So now this is the content that we want to send to Resi, and I will click on Live and I can say, “Start streaming.” And this will start our stream to Resi, and you’ll see it start counting up. Now, we can go back to our Resi control panel, and in a minute, you’ll see a new encoding profile that will start. Now, this might take a minute to show up, because with Resi, we’re not worried about having everything be as close to real time as possible. We’re more concerned about having the highest quality stream and the least amount of issues so that people stay engaged with our stream as long as possible.
So here you’ll see, we have a new encoder event that juststarted when our stream started, and then we have a new web event that startedautomatically. And you’ll see that the status is started and that it’s sendingto this social media channel and that the social status is started as well.Now, the main buttons here that we want to look at is our watch and analyticsbutton. I’m going to click on watch, and this will bring us to our stream, andyou’ll see that this is going to start showing our stream here, and thequality’s going to increase here in just a second so we’re getting our highestquality. And I got this glitchy background, so we got some crazy graphics goingon here.
But then down here, we can actually go and see where we’re sending out live to YouTube. So we can click on view on YouTube, and we can go over, and this will show us our YouTube page, and you can see our stream going here Live. And again, this is our high quality graphics that are being sent, and we’re testing Resi, and all of the settings that we’ve inputted are showing there. Now, we could easily go in here and click on share, and we could pull an embed code for this YouTube player and embed that wherever we want as well.
And again, if we want to get the embed code for our videoplayer, we’re going to go to event profiles, and we’re going to click on ourweb event profile, go to actions and details, and here you’ll find the embedcode that you need for your different websites. So you’ll need this div andthis script to include to show your player on your webpage. Now, if you hadthings for apps or different services like that, you would see that under streamingURLs. Right here is where you would find that information to use inside ofdifferent apps and other services.
Now, if you need help or support, make sure that you reach out to the proper support team. So if your stream is being sent properly from ProPresenter to Resi and you’re seeing it in the Resi interface, but you’re having an issue with content getting out to social media or viewing a web player, make sure to reach out to Resi’s support team. But if you’re having a problem sending the stream to Resi and it doesn’t seem like it’s encoding or connecting to Resi properly, make sure to reach out to ProPresenter’s support team.
Stay Updated with Our Newsletter
Get the latest news, updates, and exclusive offers delivered straight to your inbox.
Questions?
Browse our FAQs or our Knowledge base that we’ve made to answer your questions. Need additional help? Connect with a support team agent!
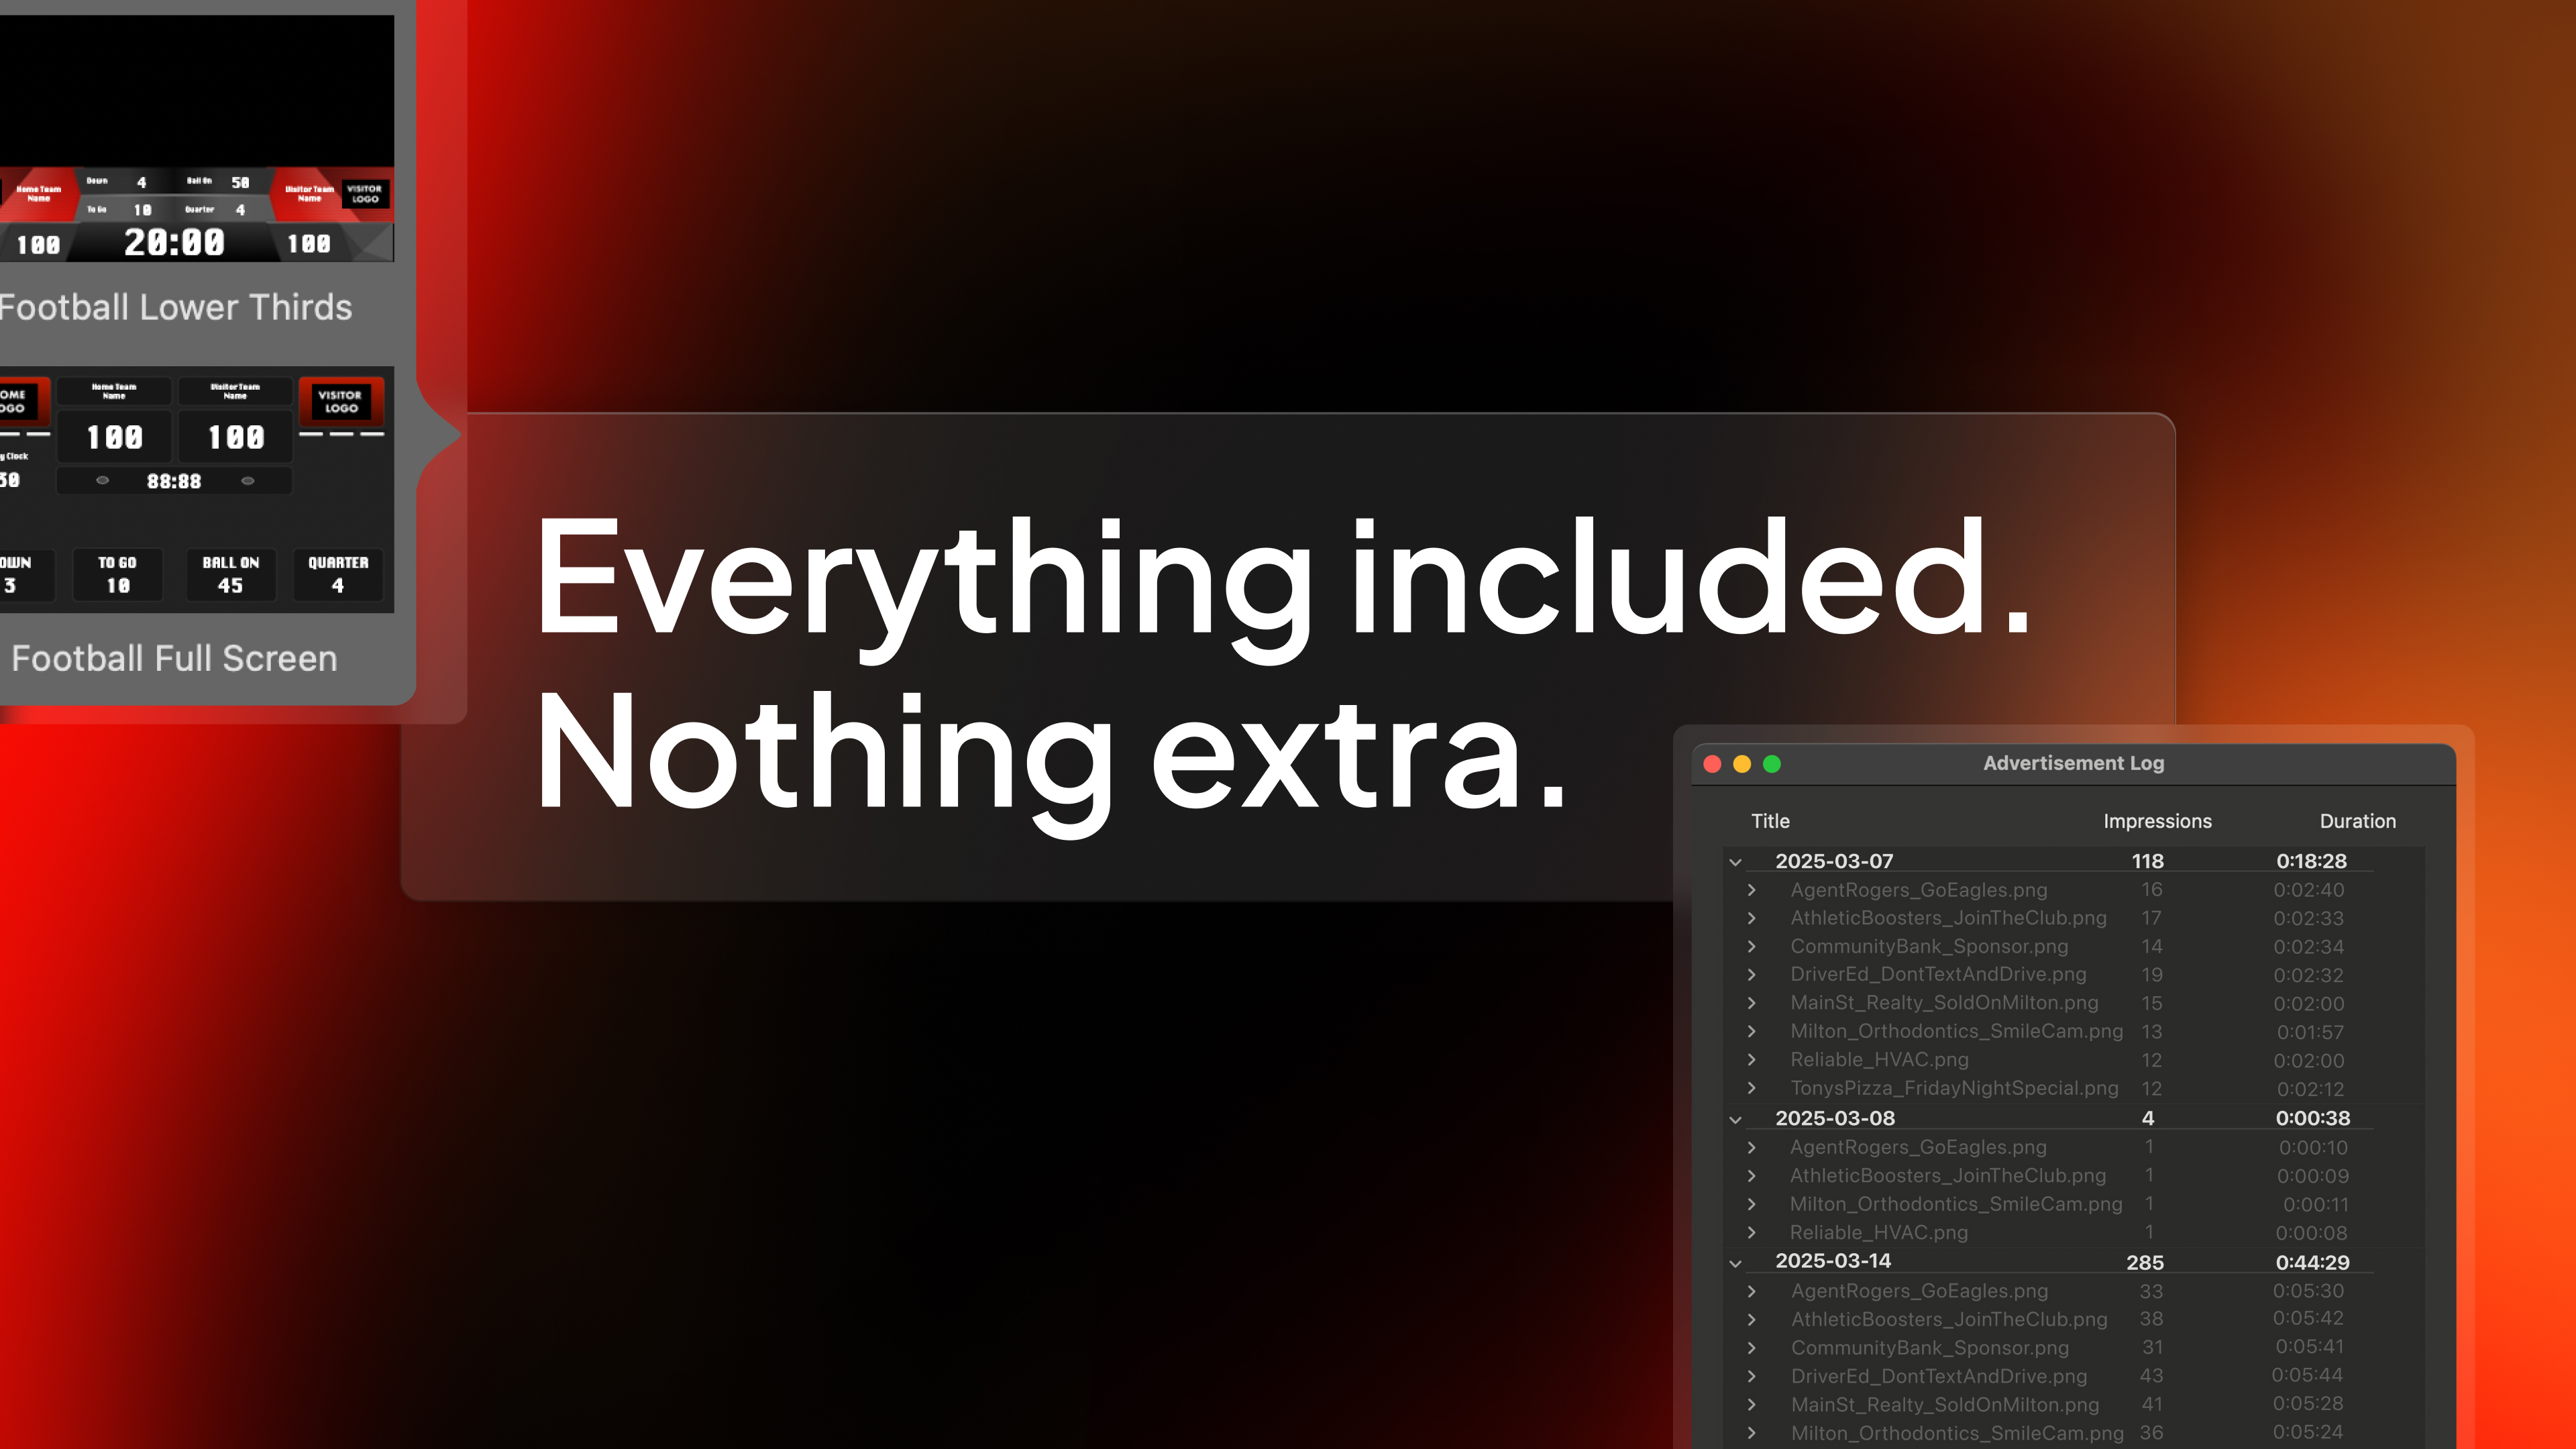
What’s included in a ProScoreboard subscription?
A subscription gives you access to ongoing updates ensuring your software always stays current, a ProContent starter pack customized to your teams colors to enhance your game-day visuals, editable scoring templates with ready-to-go layouts you can easily tweak, video tutorials and 7-days a week support.
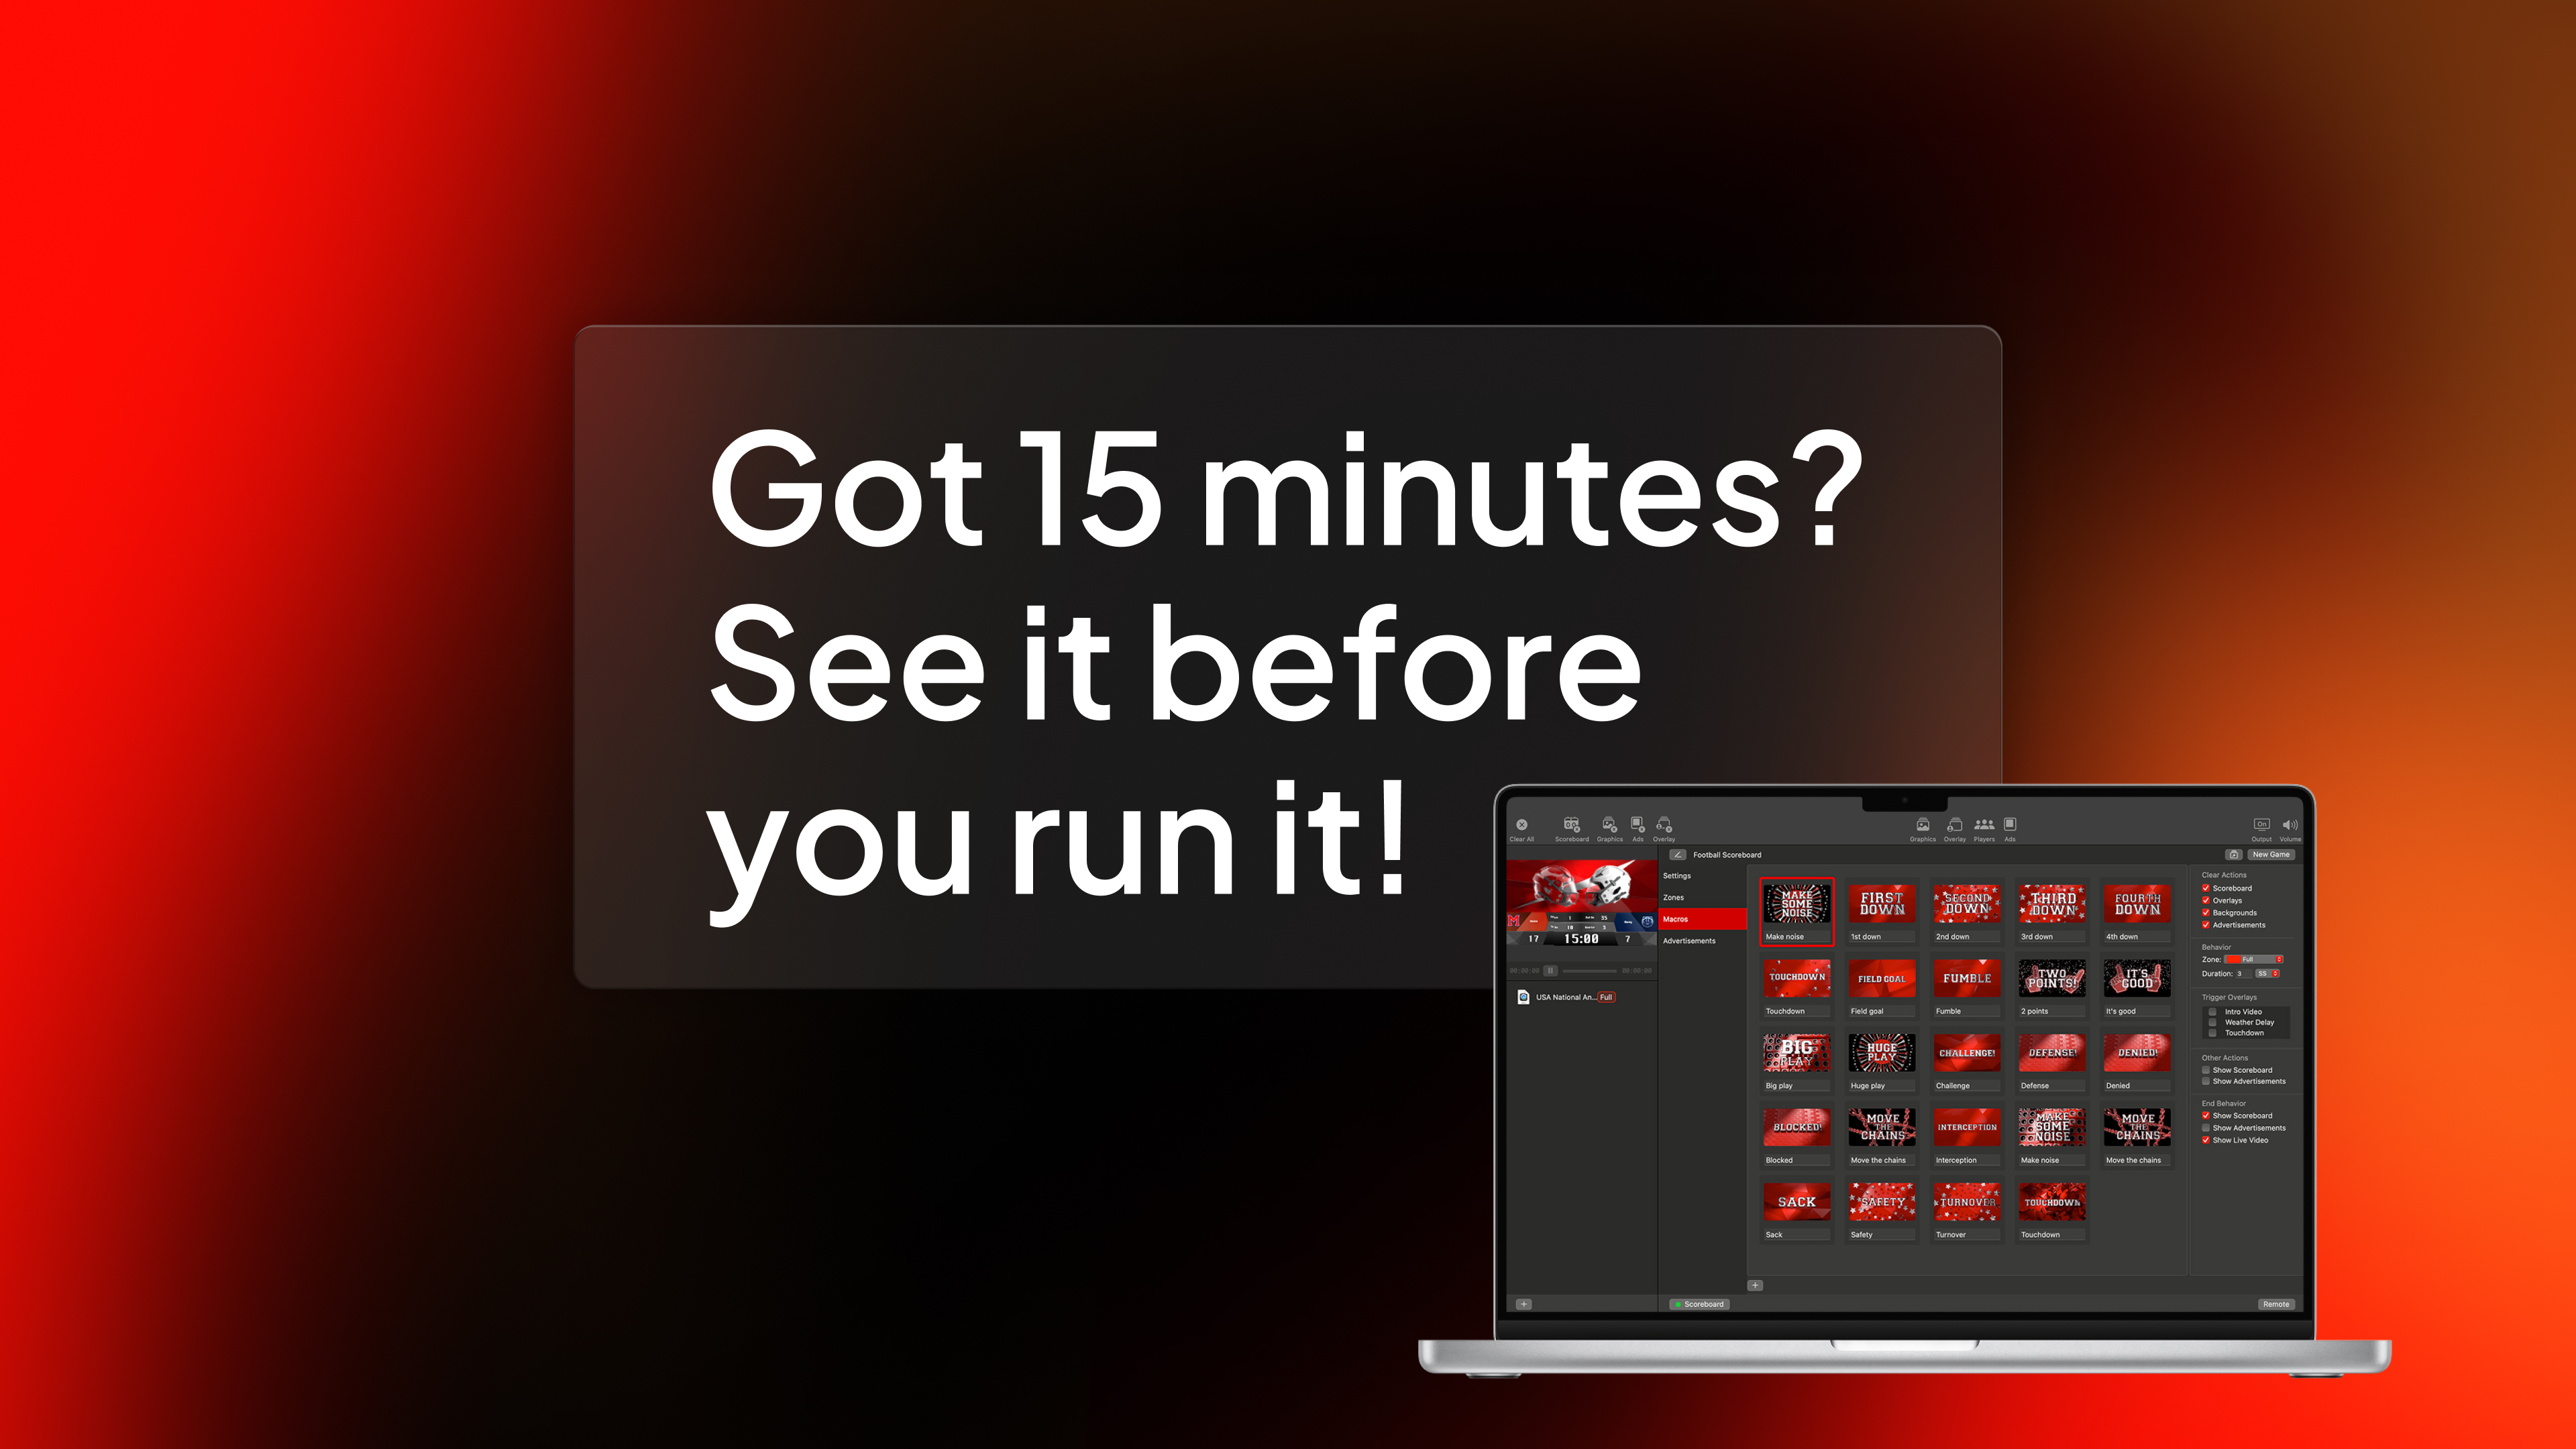
How is ProScoreboard different from traditional systems?
Traditional systems are often expensive, in a fixed-location, and hard to update. ProScoreboard gives you flexibility, portability, and dynamic visuals at a fraction of the cost… all while working on hardware you already own.
Does ProScoreboard work for multiple sports?
One license, multiple sports. Switch between custom layouts in seconds, making it perfect for schools and venues that host a variety of athletic events. ProScoreboard is built for versatility; supporting football, basketball, baseball, volleyball, soccer, hockey, tennis, lacrosse, Australian football, and more. Each sport has a purpose-built layout with the correct rules and visuals, so you can create a professional experience for any game.
Can ProScoreboard integrate with existing LED or fixed-digit scoreboards?
Yes. ProScoreboard works with most scoreboard controllers. With just a serial connection and a simple dropdown setting, you can sync your visuals with existing systems- even legacy ones. We’ve done the heavy lifting so your transition is seamless.
Does it work with Scoretables or smaller setups?
Not every gym has a massive LED wall. That’s why we offer a Scoretable Edition, built specifically for tabletop displays at a lower cost. Run it solo or link it with larger displays. Available through resellers like Boostr, Formetco, and Digital Scoreboards.