
Video Transcription:
The editor of ProPresenter 7 is more powerful than ever, giving you the flexibility to create and show your content exactly the way you want. To access the editor, we’re going to click on edit from the main toolbar. Now, you can get back to your show at any time by clicking show.
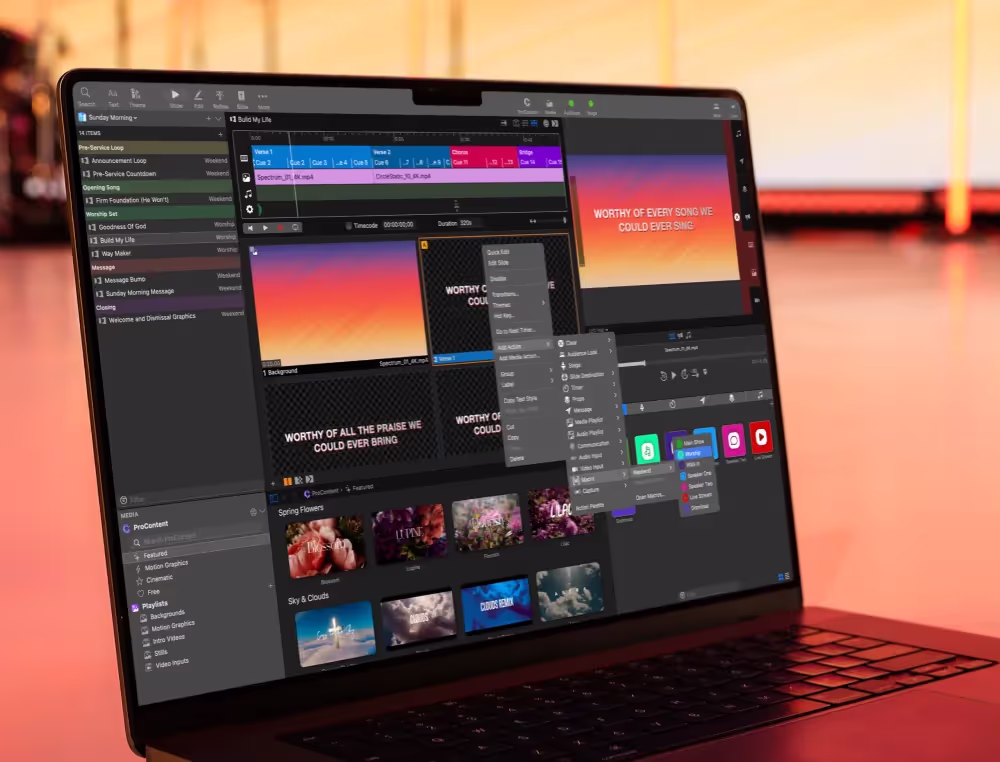
The left side of the editor shows us all of the slides in this presentation. Below there, you can see any objects that are on the currently selected slide. Now, since we don’t have any objects selected right now, our right properties panel is showing us information about this presentation, things like the size of this presentation, transition, and copyright information. We can also see properties about this particular slide, whether it’s enabled, it’s hotkey, special labels, backgrounds, and chord charts. Down at the bottom, we can click on slide notes to add notes for this particular slide.
These slide notes now have rich text formatting. We can change things like the font that’s being used, the size of that font, bold, underlying, and the font color. All of that will show up when you show your slide notes on the stage display. Now, if we click on an object on our slide, our properties panel is going to show us properties and information about this particular object.
You’ll see helpful things like alignment tools as well as position size, transformation, and opacity settings for this object. We also have new fill options. We can choose the default color, or we can choose a gradient fill, a media fill, like an image or a video, a website fill, a video input fill, or even other slide objects.
I’m going to choose a gradient fill, and we can quickly adjust this gradient with new colors. If we wanted to, we could change the angle. Now, we can go down to stroke and enable that if we would like and choose from different stroke styles. We also have shadow options where we can add a drop shadow for this shape. You’ll see that we also already have a shadow on our text. You can have two different shadows at the same time.
Then, finally, we have feathering options that allow us to feather the shape and feather and blur the edges. Then, finally, we have visibility options, which are really powerful and allow us to decide whether or not our object is shown based on different criteria. Now, if we go over to our text options, you’ll see that we can copy textiles. We can change out our font and do bold and underline. If we want to adjust more font settings, we can click the gear icon. We can see things like all caps and our character spacing, line height, and line spacing in margins of our text box.
We can change the color of our text, and we can set text scaling. We have options to fit container to text, scale text up to fit container, scale text down to fit container, or scale up or down to fit container. We can also set alignment options and a stroke for our text that’s different than the stroke for our shape. Like I said earlier, we have a shadow option, which, again, is different than the shadow of our shape. We can also enable lines only, which will put lines behind each row of text.
We can do an offset here so that we can see what this looks like. I can scale this down, and it’s going to put a line behind each line of text in the text box if I have that enabled. We can enable the list options so that we can put bullet points or different characters before each line.
Then, finally, we can link different texts. This is a really powerful way to bring in text from other areas in the program. Here we can choose the source, and we can choose a different slide object. We can use timers or a system clock. We can do a text ticker, and we can include video countdowns.
Now, let’s take a look at some of the other objects we can add to our slide. I’m going to go to add, and you’ll see text and media and video and web. But we also have some awesome new shape options in ProPresenter 7. Let’s go down to arrow. Here you’ll see that our arrow tool has a new control point that allows us to control the size of our arrow and the shape of it so that we can get our arrow exactly the way we want it to look.
We could also add in another shape, like a star. Now, the star shape actually has an amount of points. We can turn the amount of points way high, and then we could maybe change the radius of this with the control point. We could make a fun little badge. Now, any of these objects can use our new shape fills. Right now, it’s set to color. But we can go in here. We could set this to a gradient as well. Now, we have this customized star with a nice gradient.
Now, as I move this around, you’ll see all of the new snapping and alignment features. This is helping me align this shape to the center of the screen. But I also can move it over, and you’ll see it will help me align the edge of it to the center of the screen or the edge of it to the edge of other objects and to the center of other objects. These new alignment features will make it really easy for you to get the pixel-perfect design that you’re looking for.
If we want to change the order of these objects, all we need to do is go down to our objects, and we could pull this behind the other object. We also have some view options where we can toggle the visibility of an object or lock an object so that we don’t accidentally move it. Plus, we can go down and turn on a transparency grid. We can enable different guides for our slide guides or template guides. We also can enable a grid and turn on and off our ruler. As you can see, the new editor has so many powerful new features. We can’t wait to see what you create.
Stay Updated with Our Newsletter
Get the latest news, updates, and exclusive offers delivered straight to your inbox.
Questions?
Browse our FAQs or our Knowledge base that we’ve made to answer your questions. Need additional help? Connect with a support team agent!
What’s included in a ProScoreboard subscription?
A subscription gives you access to ongoing updates ensuring your software always stays current, a ProContent starter pack customized to your teams colors to enhance your game-day visuals, editable scoring templates with ready-to-go layouts you can easily tweak, video tutorials and 7-days a week support.
How is ProScoreboard different from traditional systems?
Traditional systems are often expensive, in a fixed-location, and hard to update. ProScoreboard gives you flexibility, portability, and dynamic visuals at a fraction of the cost… all while working on hardware you already own.
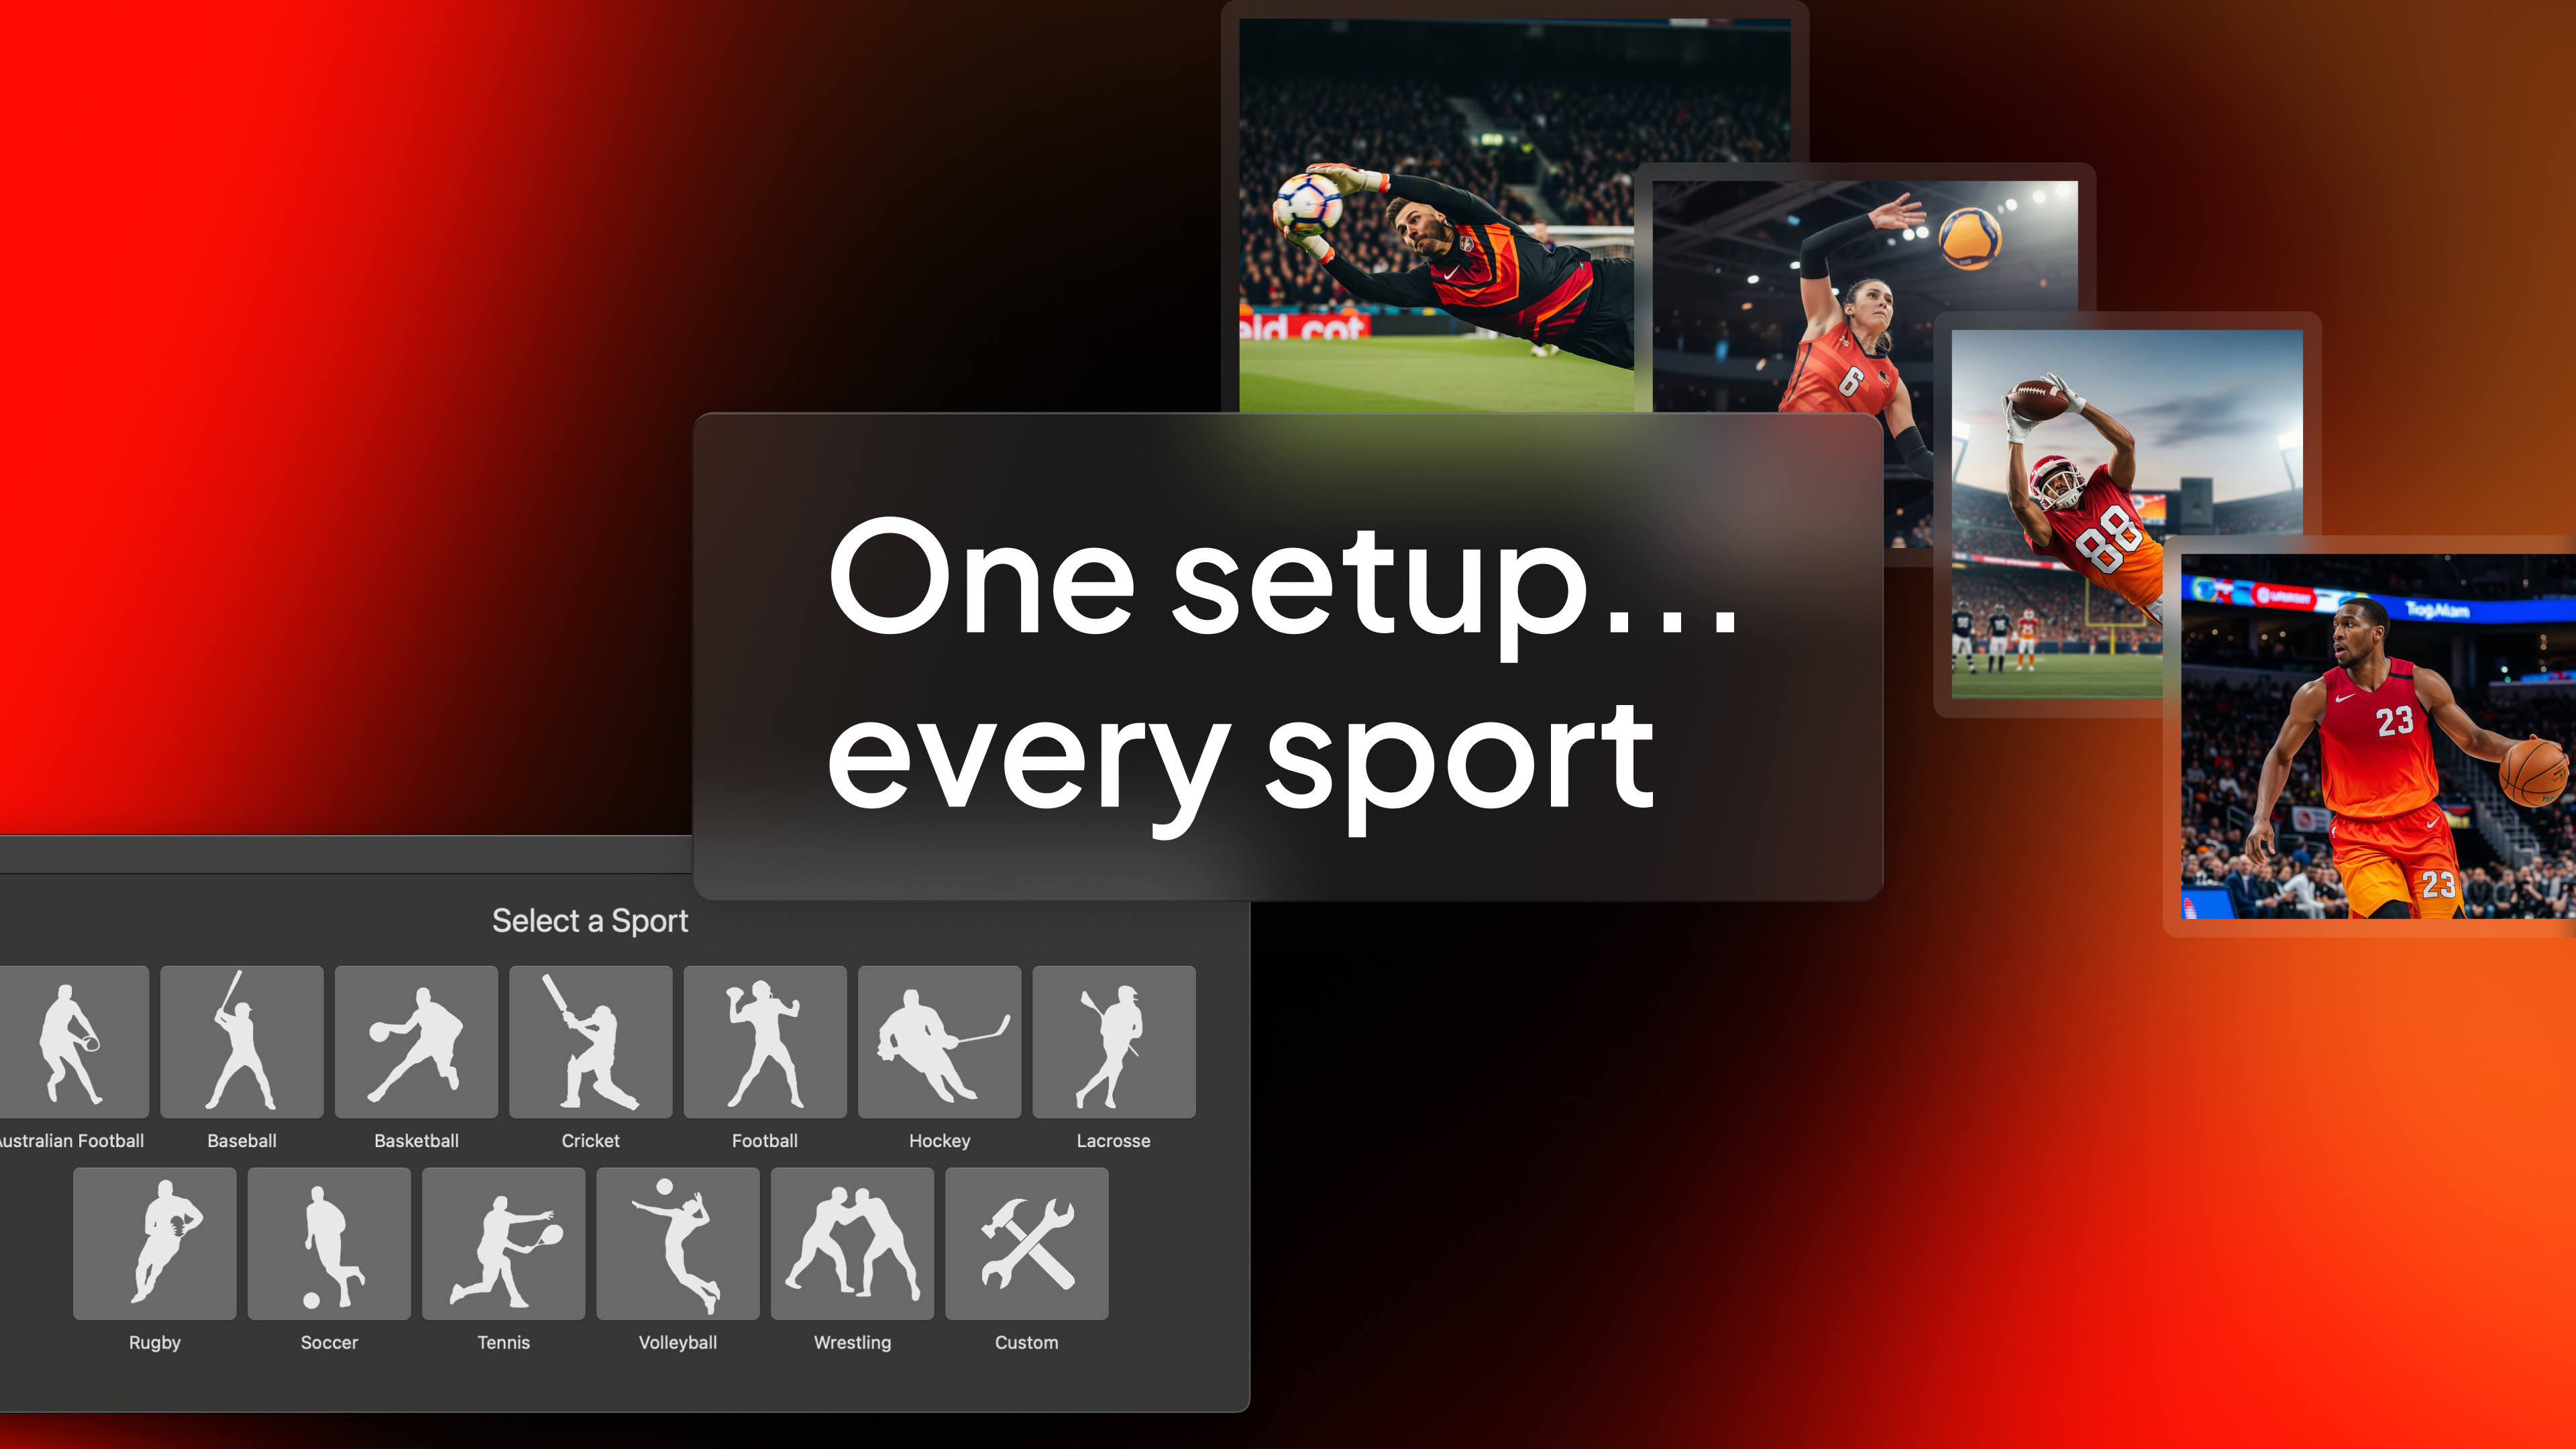
Does ProScoreboard work for multiple sports?
One license, multiple sports. Switch between custom layouts in seconds, making it perfect for schools and venues that host a variety of athletic events. ProScoreboard is built for versatility; supporting football, basketball, baseball, volleyball, soccer, hockey, tennis, lacrosse, Australian football, and more. Each sport has a purpose-built layout with the correct rules and visuals, so you can create a professional experience for any game.
Can ProScoreboard integrate with existing LED or fixed-digit scoreboards?
Yes. ProScoreboard works with most scoreboard controllers. With just a serial connection and a simple dropdown setting, you can sync your visuals with existing systems- even legacy ones. We’ve done the heavy lifting so your transition is seamless.
Does it work with Scoretables or smaller setups?
Not every gym has a massive LED wall. That’s why we offer a Scoretable Edition, built specifically for tabletop displays at a lower cost. Run it solo or link it with larger displays. Available through resellers like Boostr, Formetco, and Digital Scoreboards.