Learn more Introducing the ProPresenter Lyric Banner!
Video Transcription:
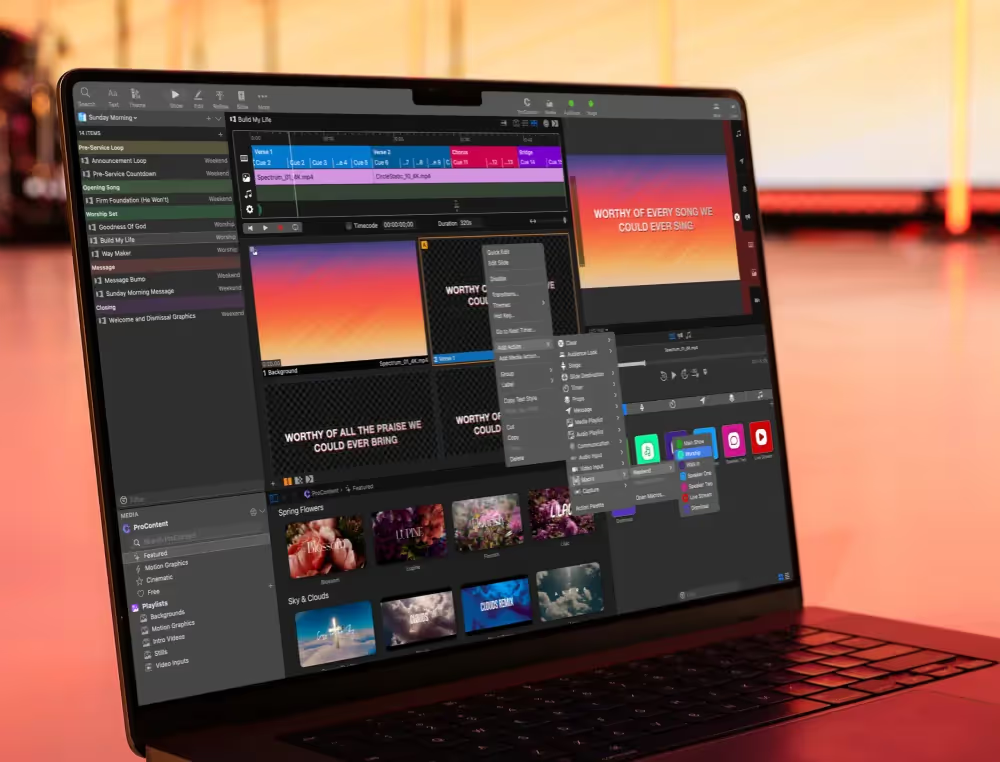
With Looks in ProPresenter 7, you can send different layers or different versions of your slides to all of your screens and change these looks out on the fly using presets.
Now to get started, we need to look at what screens we have available to use with Looks. So let’s go to Screens and Configure Screens. You’ll see that I have three different Audience screens. I have our Main Output that we’re going to use in our main room. Then we have a Lobby screen that we are going to use for digital signage.
And then I have a Switcher screen, which will be sent to our video switcher for things like key text and lower thirds. So now let’s look at how to utilize these screens with Looks. So I’m going to close this out. I’m going to go to Screens and Edit Looks.
Here you’ll see our same three screens. We have our Main Output, our Lobby screen, and our video Switcher. But below there what you’ll see is all of the layers that are available for each of those screens.
Now an easy way to visualize how these layers work on your screens is by clicking, Enable Identify, and this will show you all of the layers in stacking order that are on your screens. This is currently showing what’s on our Main Output. Now for our Main Output, I don’t want to show our Announcements layer, so I’m going to turn that off and we don’t need Video Input, so I’m going to turn that off as well.
Now for our Lobby screen, I do want to use the new Announcements layer, but I don’t need the Video Input either. And for our video Switcher, I don’t need anything except for the Slide layer. And on the Slide layer, we’re actually going to use a custom theme to change the look of our text in any slide content.
So I’m going to click here and I’m going to go to Lower 3rd, and I’m going to choose this Keyed Bottom Lower 3rd text that I have. So now that I have this look set up, let’s see it in action. So we’re going to click on some song lyrics and they’re going to play just like you would expect them to on our Main Output. If I switch to our Lobby screen, you’ll see that this is showing the exact same thing. And if I switch to our Switcher, you’ll see it’s using that green screen Lower 3rd theme that we set up to reformat the text.
Now what about that Announcements layer that we set up on our Lobby screen? If I go over to Announcement Loop, you’ll see an icon here, which indicates that I’ve changed the presentation destination for this document. The way you do that is by clicking here, and you can choose from Presentation or Announcements.
Presentation sends to the normal presentation layer and Announcements sends to the new announcements layer. So with that selected, if I click on this, you’ll see that nothing changes on our video Switcher because that layer is not enabled and nothing changes on our Main Output because our Announcement layer’s not enabled. But if we go to our Lobby, you’ll see this Announcement Loop showing up here. Now to make this easier to visualize, I set up a stage display that previews all three of our different screens.
So you can see on our Main Output, we have our lyrics going, on our lobby, we have our Announcement Loop, and on our Switcher we have that custom theme that’s showing our text formatted differently. And we can clear out that Announcement layer by going over here and choosing Clear Announcements, which will show the content that’s below on our Lobby screen, which is the same as our Main Output.
So this gives you a great picture of how powerful this new Announcements layer is, and multiple screens are to send different content to different screens. Now, to make it easier to change between these looks, we can set up a preset. So let’s go to Screens and down to Edit Looks. I’m going to add a new look preset, and we’re going to call this Teaching.
And for our Teaching look, we’re going to again turn off the Announcements layer on our main screen and video input. We’re also going to turn that off on our Lobby screen to ensure that our presentation content gets sent to our Lobby screen. And then for our Switcher, we’re going to just use a different theme.
And so for this one, I’m going to use this Keyed Side theme, which is great for teaching content. Now, we could switch between these looks by just clicking Make Live, or we could go back up to Screens and down to our Looks and we could choose which look from this dropdown menu. But instead what we’re going to do is we’re going to use an action from the Action Palette to enable this look when we click on a slide.
So let’s go to view and down to Action Palette. And we’re going to choose an Audience Look, and we’re going to apply that to this slide. And for this slide, we want to switch it to teaching. We’ll say Done and we can close out our Action Palette. Now when we click on this slide, it’s going to change the look that we’re using and it’s going to change the text. So now on our Main Output, we have our big full screen text, and on our video Switcher we have our side look. And this will stay the same until we click on a new slide with a different Audience Look.
So again, we could go to View and down to Action Palette, and we could maybe enable a different Audience Look on this slide. And we could set this to Default. And now when we click on this slide, it’s going to switch us back to our default look with our Lower 3rd text instead of our Side text. So that’s how you can use the looks and presets to change all of the different content that’s being shown on your screens.
By subscribing, you agree to our Terms and Conditions.
Experience the power of ProPresenter
Take your production to the next level with ProPresenter's intuitive suite of tools.

Stay Updated with Our Newsletter
Get the latest news, updates, and exclusive offers delivered straight to your inbox.

Questions?
Browse our FAQs or our Knowledge base that we’ve made to answer your questions. Need additional help? Connect with a support team agent!


.png)
.avif)