
Video Transcription:
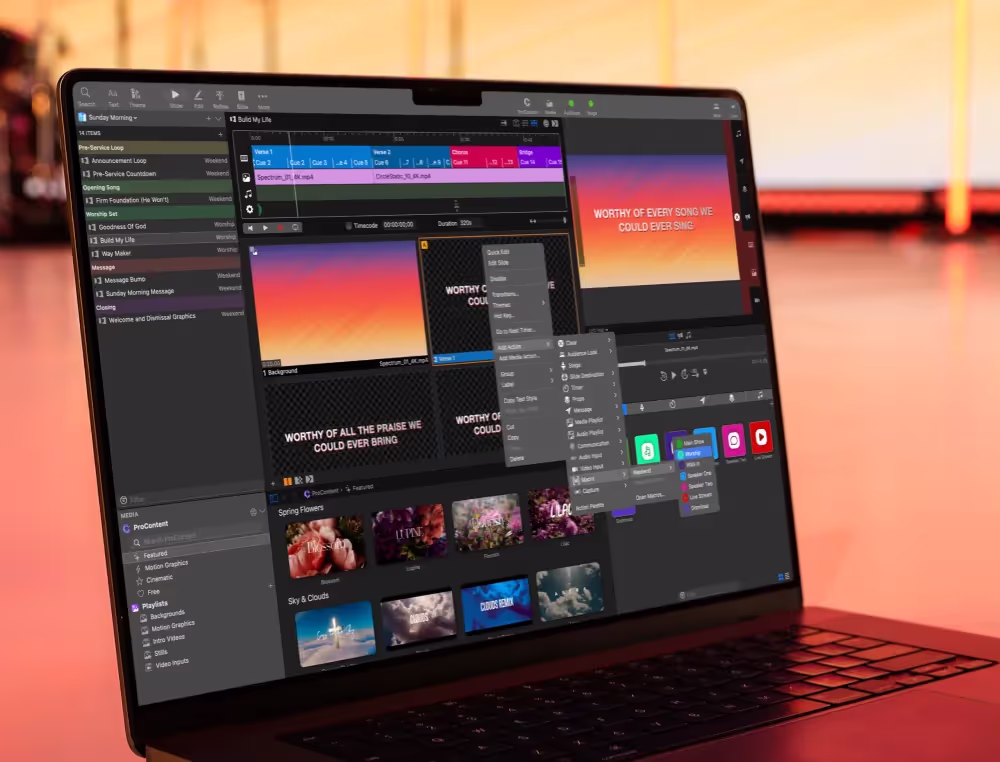
ProPresenter 7 gives you great new flexibility when using Matrox DualHead2Go, TripleHead2Go and QuadHead2Go devices, or similar image splitting devices that take one large image from your computer and split it into multiple outputs. Once you’ve set up your device and it’s working with your computer, to configure it inside ProPresenter, we can go to Screens > Configure Screens. Now you’ll see, I already have a triple wide screen here, but if you were looking for your triple-wide device or DualHead2Go device, you would find it under your output settings and you would see it listed in this dropdown menu. I’m currently using a Placeholder to represent this, and it’s a 5760 by 1080 screen. And that’s a triple-wide 1080p output. Now, if you wanted to just use that as one giant output, you wouldn’t need to change anything, but if you want to utilize those three outputs in different ways, we need to change our output target.
Currently the output target is set to full, but we would want to change it for a triple-wide screen to be a 3×1 grid. Here we can choose the alignment of which portion, which third of that screen do we want to use for this screen? So, for this screen, I’m going to use the output of the left third of that triple-wide screen, which is 1920 by 1080. Now we could add in another Audience display, we’re going to choose our same triple-wide screen. And again, we’re going to change the output target to a 3×1 grid, and here we’re going to choose the middle option, so this is going to be using the middle 1920 by 1080. And for this screen, we’re going to call this our IMAG screen. And so, now we have our main output, which is all of our main output content. And then we have an IMAG screen and on this one, maybe we want to utilize these differently and we want to throw some lower third lyrics on there, so we can use that for IMAG.
Now, we can use our last third for something else, like maybe a stage display. So, we can go down to stage display and we can go in here and we can choose our triple-wide screen. And again, we’re going to go to a 3×1 grid for our output target, and we’re going to choose that last third. So now, the first third of our triple-wide is our main output. The center is for IMAG and we can format that differently using Looks. And then our last third of the image is our stage display. So, we’re utilizing the three different parts of that TripleHead2Go for three different purposes. Now, instead of using this for a stage display, let’s actually use this for another Audience output. So, I’m just going to set this back to a normal Placeholder here. We’ll set this to full. So, we’ll just leave that as a Placeholder. And now let’s add in one more Audience output. So, we’re going to add another one in, again, we’re going to select our triple-wide screen.
We’re going to set the output target to a 3×1 grid and use that final third that we haven’t utilized yet. And for this screen, we’re going to set this to be our Lobby screen. Now, we can utilize the new Announcements layer, as well as Looks to send different content to all three different pieces of this triple-wide setup. So, let’s take a quick look at Looks and the Announcements layer, so that we can send different content to each one of these. So, I’m going to close this out. I’m going to go back to screens and I’m going to go to edit Looks. Here you’ll see the same three screens that we set up in our screen configuration, our main output, our IMAG and our Lobby screen. But here we can see which layers and any custom themes that we want applied to each individual screen. So, for our main screen, we want to send everything to it, except we don’t want to send the Announcements layer and we don’t want any video inputs.
On our IMAG screen, we only want to show live video from a video input and we want our slide layer using a custom template. So, I’m going to add this lower third template that I created. And now all of my texts that’s going to this IMAG screen will always be formatted with that lower third text. Now for my Lobby screen, I want everything sent, except I don’t want my video input, but I do want my Announcements layer. Now, if I would show some announcements going to the Announcements layer, it would actually overtake the Lobby screen and you wouldn’t see anything else that’s going on until I turn that announcement loop off. So, let’s see how this works. I’m going to close this out. I’m going to go to my announcement loop. I’m going to go over here and I’m going to select the target for this presentation and I’m going to set it to Announcements. Now, when I click on this content, my main output is showing nothing. But if I go to my Lobby screen, you’ll see that it’s showing this content.
Now, I can go and click on a different presentation. I could select maybe these lyrics. You’ll see nothing’s changed on the Lobby. But if I go to my main output, you’ll see that showed up there. And if I go to my IMAG, you’ll see on there, I’m getting differently formatted text on that. So, that’s how I can utilize my TripleHead to send different content to my three different screens. Now you can do the same thing with DualHead2Go or QuadHead2Go. All you need to do is go to screens, configure screens. Now for a DualHead2Go, you would be using a 2×1 grid and you would be choosing the left or the right side of the image. And for something like a QuadHead or similar device, you could choose upper left, upper right, lower left or lower right. Hopefully this helps you see how you can utilize your DualHead2Go, TripleHead, QuadHead2Go or similar devices in a whole new way inside ProPresenter 7.


.png)
.avif)
Stay Updated with Our Newsletter
Get the latest news, updates, and exclusive offers delivered straight to your inbox.
Questions?
Browse our FAQs or our Knowledge base that we’ve made to answer your questions. Need additional help? Connect with a support team agent!