Learn more Introducing the ProPresenter Lyric Banner!
Video Transcription:
In this tutorial, we’ll learn how to send content from ProPresenter to OBS to use in your live streams, including lower thirds. And to do this, we’ll set up an output from ProPresenter using NDI or Syphon. Now, Syphon is going to be the fastest, most reliable, and least processor-intensive way to do this. However, Syphon only works on the Mac platform. If you’re on a PC or if you want to send ProPresenter from one computer to another computer on your network running OBS, you’ll need to use NDI. So to set up that screen to send to OBS, let’s go to Screens > Configure Screens. Now we have our main screen, which traditionally is being sent to our projector or our main screen in our room. Now, if I wanted to send an exact copy of that to OBS, I would just change this from single to mirror.
And then our second mirrored copy, I would configure the output to go to Syphon or to NDI. But instead of doing that, I’m going to set this back to single, I’m going to add a new Audience screen, and I’m going to set this to Syphon. We’re going to do 1280×720, and this will allow me to send customized content to OBS that’s different than our main output. That way, on our main output, we could see maybe a motion background and centered text, and in OBS, we could see maybe lower third version of our text with no background so we can use it over top of live video. So let’s just rename the screen to OBS, and then we can close this out. Next, we need to create that lower third Theme for OBS. So I’m going to go to more, and I’m going to go to my Theme Editor. On the left side here, you’ll see Countdowns.
If I click on that, you’ll see all of our different Themes that are available. And if you want to create a new Theme, you can click new Theme at the bottom. I did just that and I named it lower third. And you’ll see a couple options that I’ve already created, one with some text with a gray drop shadow and a little outline, and another one that’s got some black bars behind it with better contrast in case our text isn’t showing up well over top of video. If we wanted to add a new slide in here and customize the text, we would just hit add, and then we could adjust this text. So maybe we would go to our Text Properties, change this to like 80, and we could change the font case to maybe medium. Click on the gear icon, change our capitalization to be All Caps. Change our character spacing to maybe be eight. And that’s looking okay.
And then we could move the text down here to the bottom. Maybe we want to add a little shadow to that text and a little stroke, and then maybe we want to add a stroke to the whole shape. So we’ll add a stroke here and have a little white box around our text at the bottom. So you could create some really interesting things really quickly. And if you wanted to add more elements to your Theme, all you would need to do is hit the add icon here to add in new shapes or different objects to that slide. So now that we have some different options here for our lower third, I’m going to click on my show button, and then I’m going to go to Screens > Edit Looks. Here, you’ll see all of our screens, including that new OBS screen that we created earlier. And I can go through and enable and disable different layers to be sent to each screen.
So for our OBS screen, I don’t want to send our background media layer. I only want to send the slide layer. So I’m going to disable all of the other layers except our slide layer, and then I’m going to set a custom Theme by clicking here, and I’m going to set it to be that lower third standard one that I had created earlier. So now when I go and look at what our content looks like, when I click on the song and start it up, you’ll see my main output looks like this, but our OBS screen is just getting this lower third version of that text. So now let’s go set up OBS. I’m going to just start up some text so we can see that once we add it in. I’m going to go to OBS, and inside OBS you have scenes and sources. And an easy way to know the difference between these is you can think of scenes like a slide in ProPresenter, and sources are all of the objects on that slide.
So I created a scene here called Worship, and I just put an image in the background that’s going to be our pretend live stream video, and we’re going to add in a new source to that scene, and we’re going to add in a new Syphon client. And we’re going to create a whole new one because there are no existing ones, and we’ll hit okay. And now we can choose our source, so I’m going to choose ProPresenter Syphon one. And here, we have an option. We can see a preview of it, but we have an option to allow transparency, so I’m going to click allow transparency, and now you’ll see that we have our text right over top of our video. So now let’s go back over to ProPresenter. I’m going to just slide this over so we can see what this looks like. And inside ProPresenter, I can click on some slides, and you can see how it’s changing that over top of our video, and it looks great.
But now what if we wanted to customize what’s being sent to OBS based on what’s happening? So maybe we want lower thirds during songs, but we want full screen graphics during teaching. The way we do that is by setting up different Look presets. So let’s go to Screens > Edit Looks. Now let’s save this Look for our songs by clicking on save and save as. We can name this songs, and then let’s create a whole new Look. So we have our songs Look with that custom Theme, and then for our default Look, let’s set this back to normal, so we’re going to set no custom Look and we’re going to enable all of our different layers. So now we have songs with a custom Look and then default. Everything’s just back to normal.
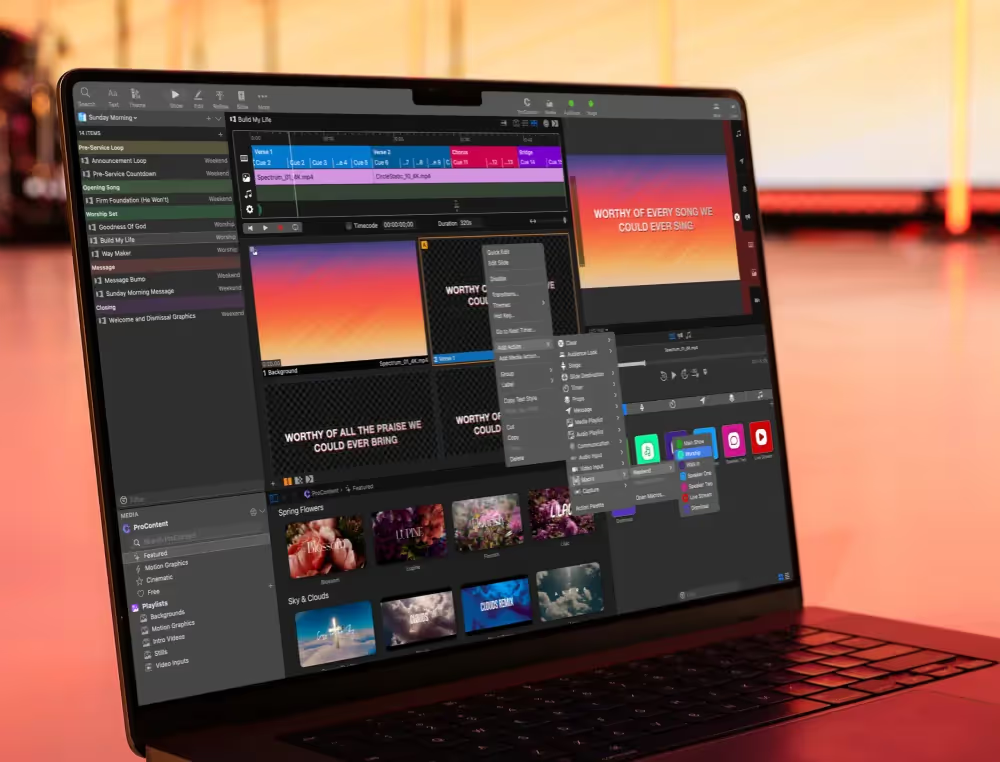
Next let’s trigger those to happen automatically using the action palette. So I’m going to go to view and to action palette. Here, we can apply different Audience Look presets by clicking and dragging them onto a slide, so I’m going to click and drag this on the beginning of this song. I’m going to change this to songs instead of default. And I’ll hit done, and then I’m going to go over to these teaching notes. And again, we’re going to go to view and to action palette. We’re going to drag another Audience Look on the beginning of this one, and I’m going to set that one to be default and hit done. So now when we go back to our song for Way Maker and we look at what’s happening inside OBS, we click on this and it’s going to throw our text at the bottom, but then when we go to our teaching notes and we click on this, you’ll see that it goes full screen.
So we have a full screen graphic here, and now we can see that going. And if we go back to Way Maker and we click on this background, and then we click on this slide, you’ll see that we’re going back and everything’s being removed. That way you can customize exactly what’s being sent to OBS at any time. The last thing that you need to know is that if you want to use NDI inside of OBS, you need to install a plugin. It doesn’t come with NDI capabilities by default. Also, at the time of recording this tutorial, there were issues with 4.7.1 of this plugin for the Mac platform, so if you’re having issues, make sure to go look for the newest version. Or if you’re on the Mac platform, you can always use Syphon. So that’s how you use ProPresenter inside of OBS.
By subscribing, you agree to our Terms and Conditions.
Experience the power of ProPresenter
Take your production to the next level with ProPresenter's intuitive suite of tools.

Stay Updated with Our Newsletter
Get the latest news, updates, and exclusive offers delivered straight to your inbox.

Questions?
Browse our FAQs or our Knowledge base that we’ve made to answer your questions. Need additional help? Connect with a support team agent!


.png)
.avif)