
*EDIT* As of ProPresenter 7.3, this article is no longer applicable. Audio Playlist (and Media Playlists) can be triggered as an action on a slide, via a macro, or through our API now.
One of the questions we’ve seen posted in our Facebook group on occasion is, “Can I trigger an audio playlist from a slide.” The answer is usually “no” because there isn’t an Action available to start a playlist. However, by using the built-in MIDI controls that are available in ProPresenter 7 you can create your own custom Action that will select a playlist and start the music in it.
Everything you need to do this on a Mac is already included with the OS. Windows requires installing a free, easy to use, third-party program.
Before continuing with this post, close ProPresenter. You will need to setup the MIDI settings for your system before ProPresenter is open in order for them to show up properly.
Getting Started on Mac
On your Mac, use Spotlight to open Audio MIDI Setup.
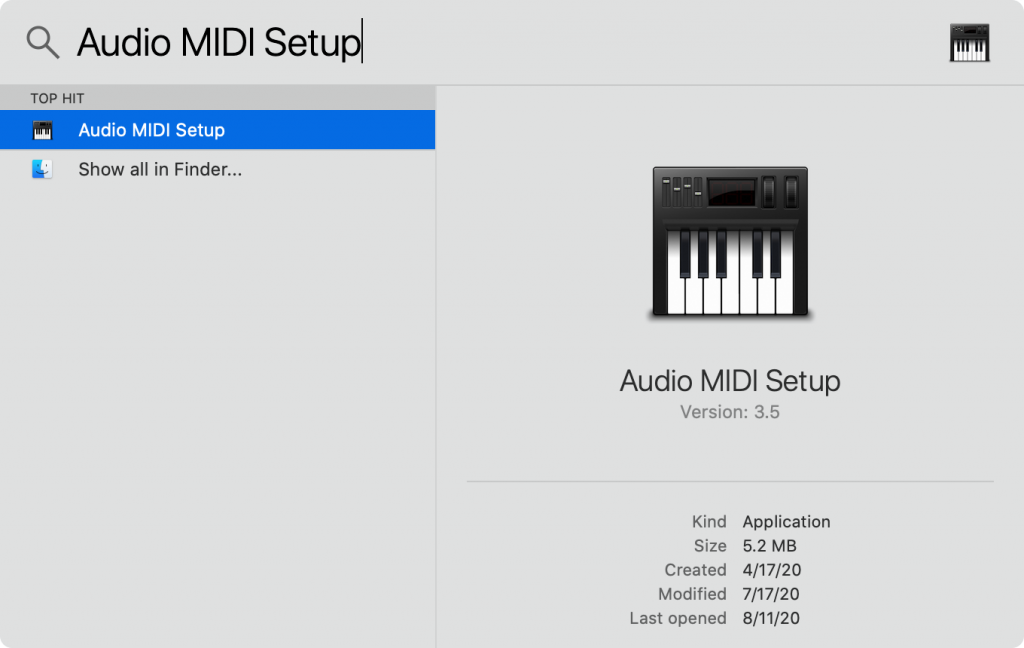
The first time you open Audio MIDI Setup you will probably see the Audio Devices list. Click on the Window menu and select Show MIDI Studio. You can close the Audio Devices window.
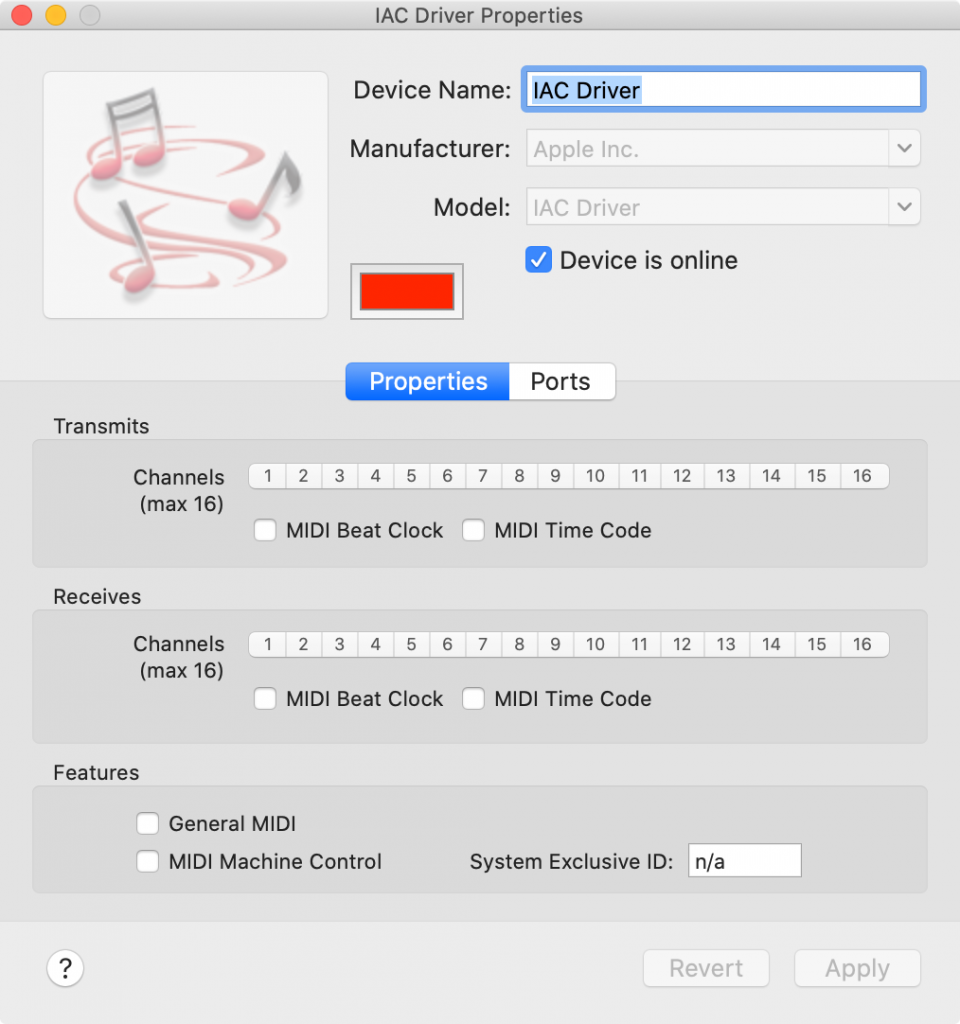
When you open MIDI Studio, you should see a window like the one shown below. Double-click on the red IAC Driver icon.

The only change you need to make on the window that opens is checking the box next to “Device is online”. If you want to change the Device Name, you can, but it isn’t required; it only shows up in Audio MIDI Setup.
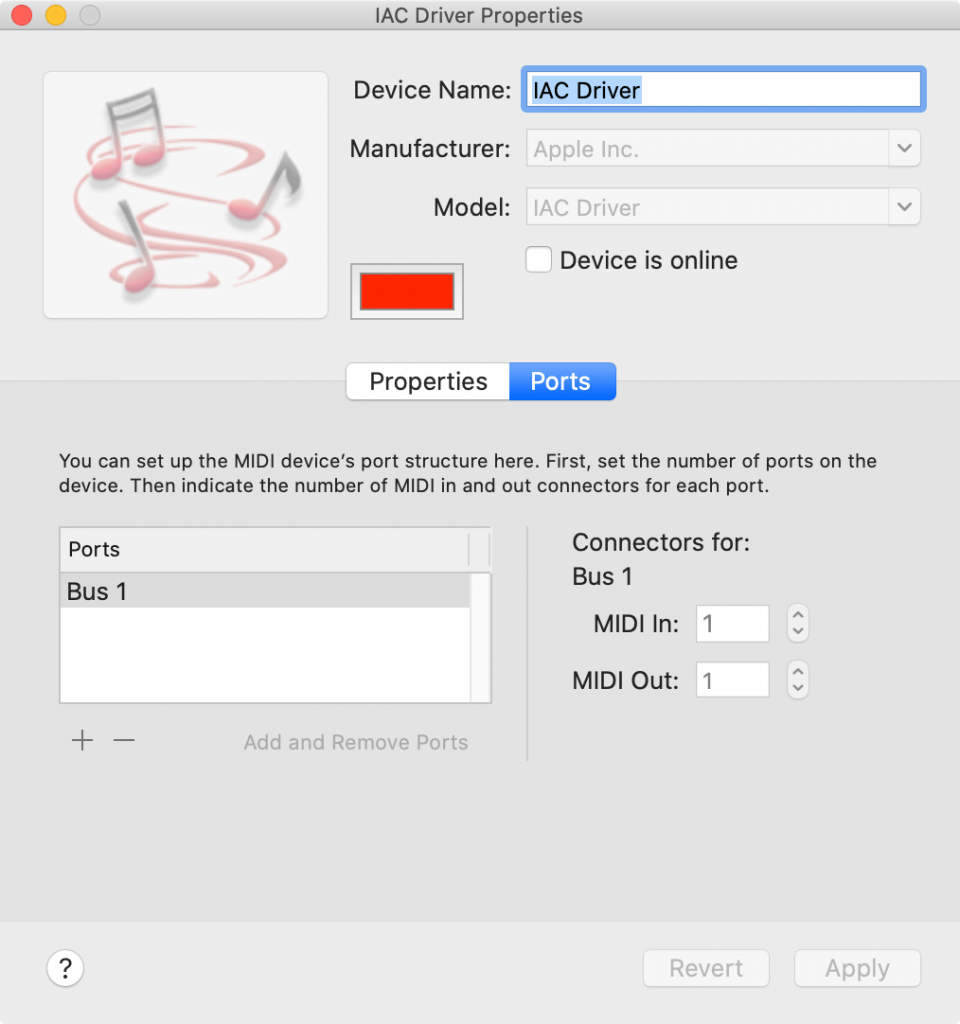
Click on the Ports button. You will see Bus 1 listed. This is the device name that will show up in ProPresenter, so you may want to rename it to be something more useful. Click Apply and then close the window when you’re done.
You can close Audio MIDI Setup now. You shouldn’t need to come back to these settings unless you need to change something. Once Audio MIDI Setup is configured, it runs in the background, so it doesn’t even need to be open to work.
Getting Started on Windows
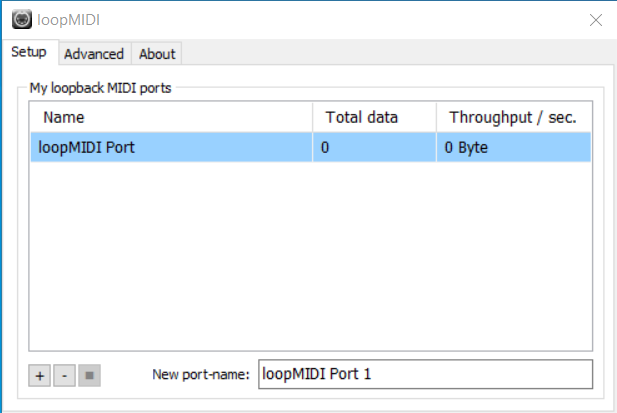
Windows does not include the same kind of built-in MIDI utilities that Mac does. You will need to install a free program called loopMIDI. You can download this program here:
https:// www.tobias-erichsen.de/software/loopmidi.html
After you open loopMIDI, you will need to click on the + button in the lower left corner. You can change the port name first if you want to since this is the name you will see in ProPresenter.
Triggering ProPresenter Audio Playlists on both Mac & Windows
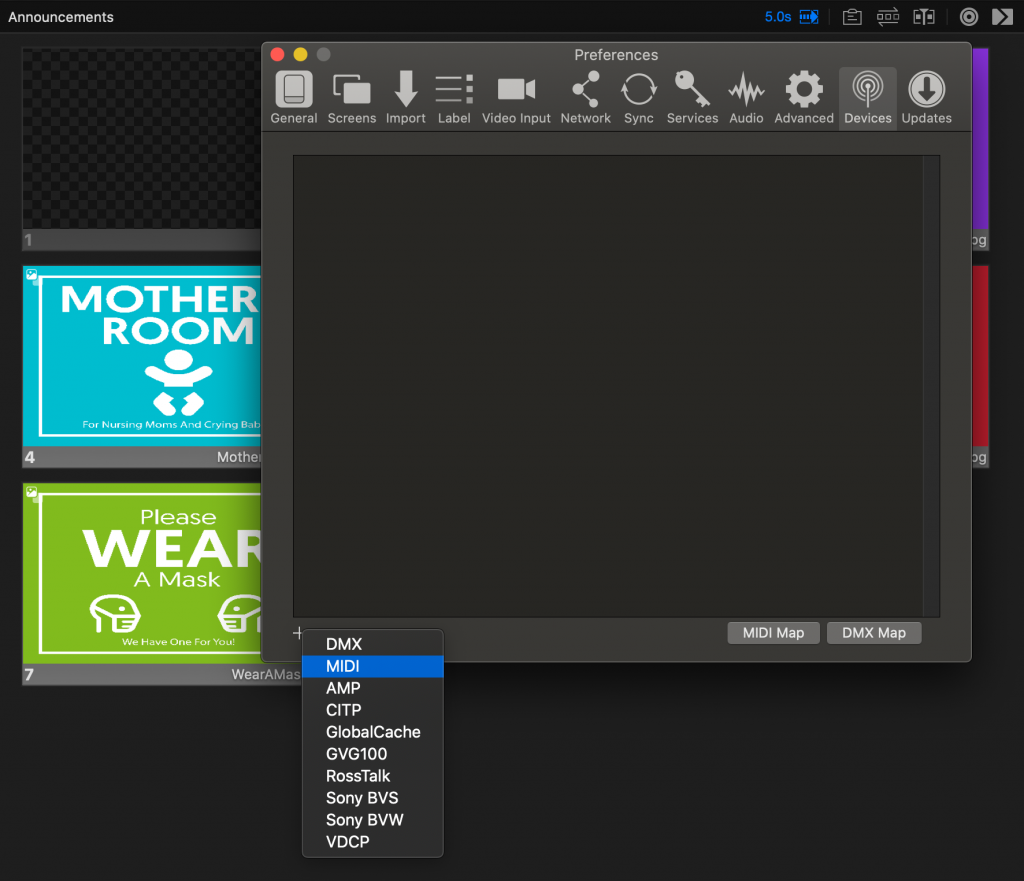
Open ProPresenter 7 and open Preferences. Click on the Devices tab. Click on the + in the bottom left corner and select MIDI from the list. This will add a new MIDI device to your window and open the settings. MIDI is currently the only device available for Windows.
On Mac
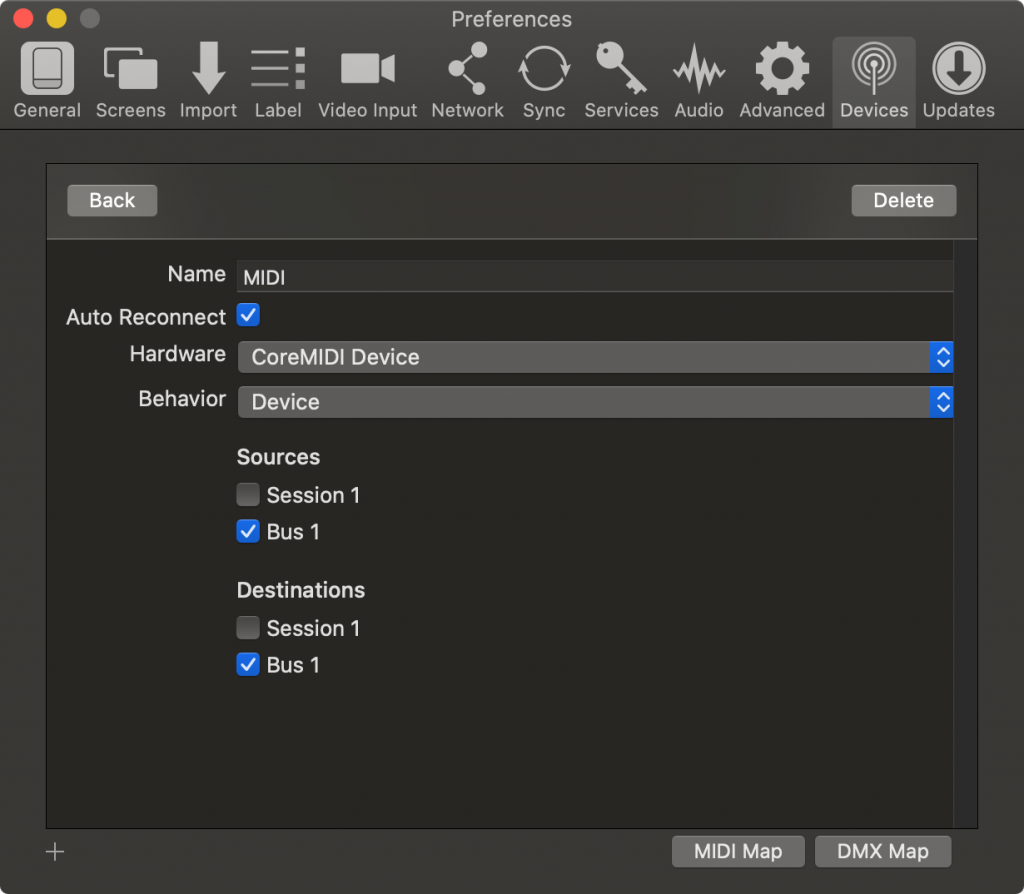
When the settings open, select Bus 1 (or whatever you named it) under Sources and Destination. This will allow ProPresenter to send and receive commands to itself.
On Windows
When the settings open, select loopMIDI Port (or whatever you named it) under Sources and Destination. This will allow ProPresenter to send and receive commands to itself.

Mac and Windows
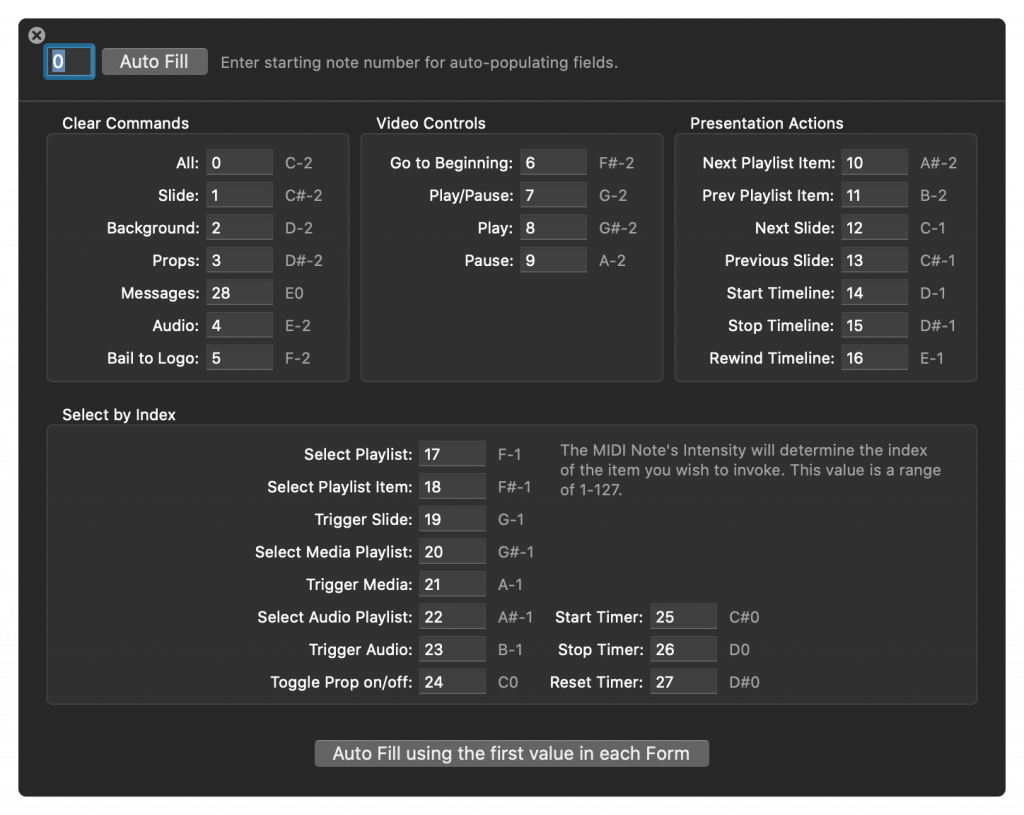
Click on MIDI Map. You can enter any number from 0 – 99 and then click on Auto Fill to automatically set up the note numbers. If you aren’t using MIDI for anything else, then you don’t need to worry about changing the default values.
There are only two MIDI notes that you need from this list: “Select Audio Playlist” and “Trigger Audio”. These are 22 and 23, respectively. If you start your notes from a different starting number, your notes will be different.
After you have everything configured, click the Back button at the top of the window.
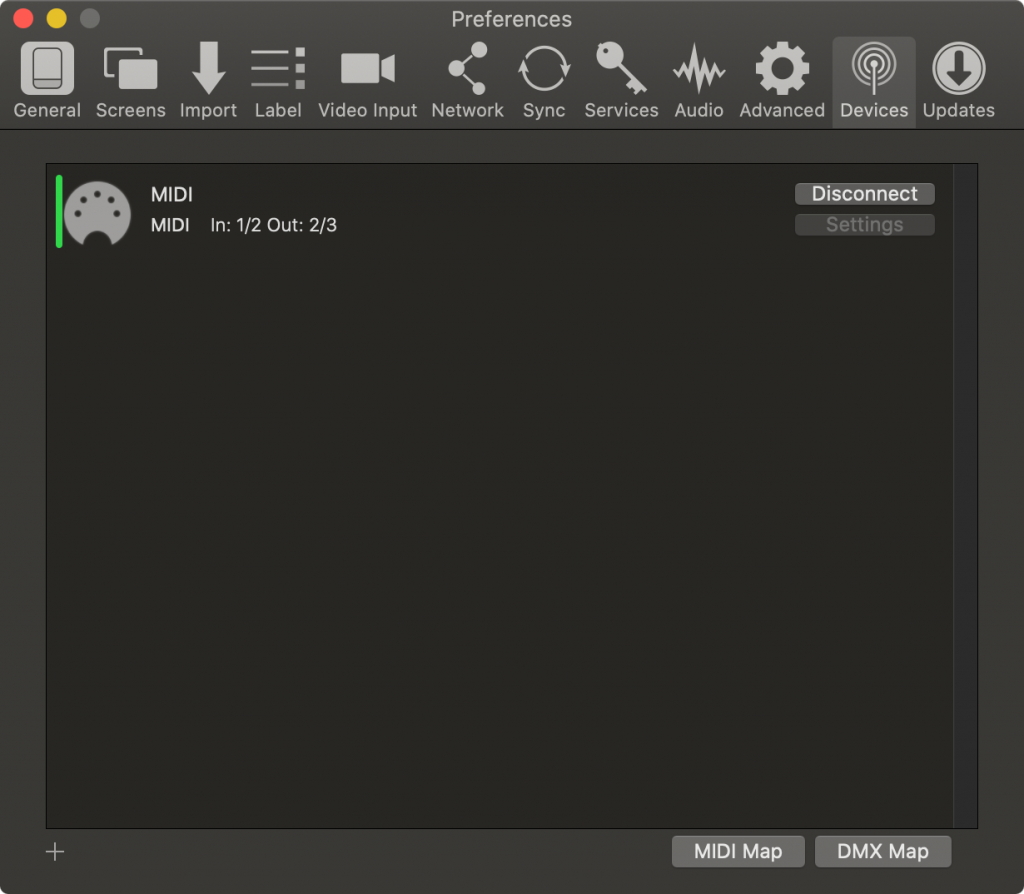
Click the Connect button. If your MIDI device connects successfully, it should have a green line next to it. You’re now ready to setup a presentation to trigger your audio playlist! You can close Preferences and select any document in your library.
Since most announcements are set up to loop, you will need to take an extra step here to prevent your audio playlist from being triggered every single time the announcements loop. Add a blank slide to the front of your presentation, then right-click on it and choose Disable Slide. This will allow you to click on the slide to start your music, but it will get skipped when the presentation loops.

The next step is adding MIDI cues to the slide you just added. Before you do that, you will need to understand how the MIDI notes work. A MIDI cue is made up of a Note (like on a piano) and Intensity (how loud is the note). Notes are used to specify what action to take, and if there are sub-options, the Intensity is used to select the right option. Some things, like “Go to next slide” don’t have options, so all that you need is the Note and the Intensity doesn’t affect anything. However, when you’re selecting an audio playlist, you need to know which playlist to select.
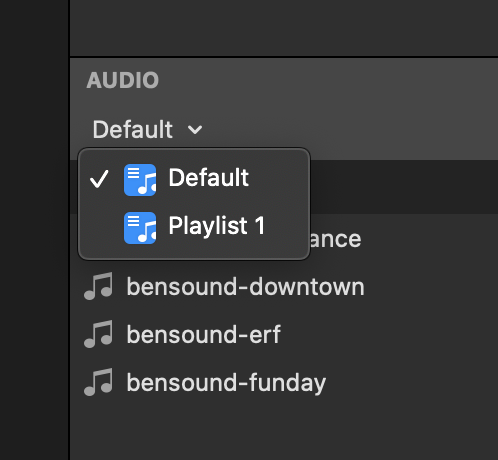
In the image below, there are two audio playlists. “Default”, which is the one we want to select, would be selected by using Note 22 with Intensity 1. “Playlist 1” would be Note 22 with Intensity 2. If you have multiple playlists, just count from the top to get the velocity that you need to assign your note.
There is a known bug in the Windows version with selecting a specific playlist. However, you can still trigger audio to play in the currently selected audio playlist. You can still follow the steps for adding both MIDI cues, but for now, you only need the second one for this to work. Just remember to choose the correct audio playlist.
There is also a limitation in both versions with selecting playlists that are nested in Playlist Folders. This is currently not supported via MIDI, so only playlists that are not in a folder can be selected.
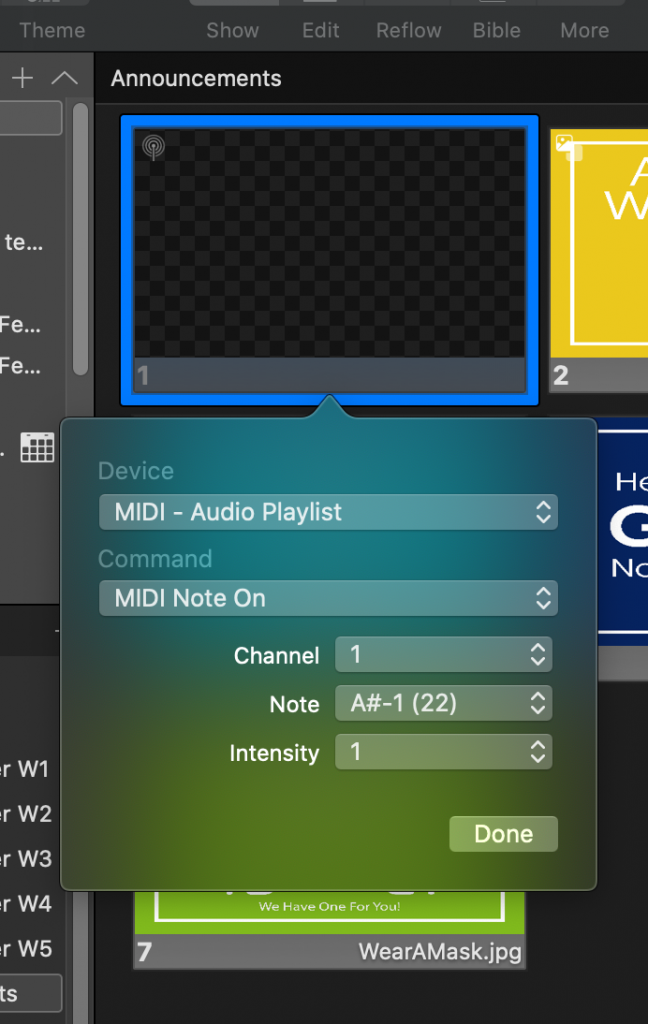
Right-click on the first slide, hove over Add Action > Communication > MIDI. Click on MIDI Note On to add the MIDI Action and open the options.

Select the Note and Intensity that match your settings. There is no need to change the Channel. Click the Done button after setting your MIDI options. If you have multiple audio playlists, select a different playlist and then click on your slide to test if the action you just added selects the correct playlist.
Repeat these same steps to add the second MIDI cue to select the audio file. This will be the next note and your Intensity will be 1 to select the first track. If you want to start somewhere other than with the first track, count to the track you want and select that as your Intensity.
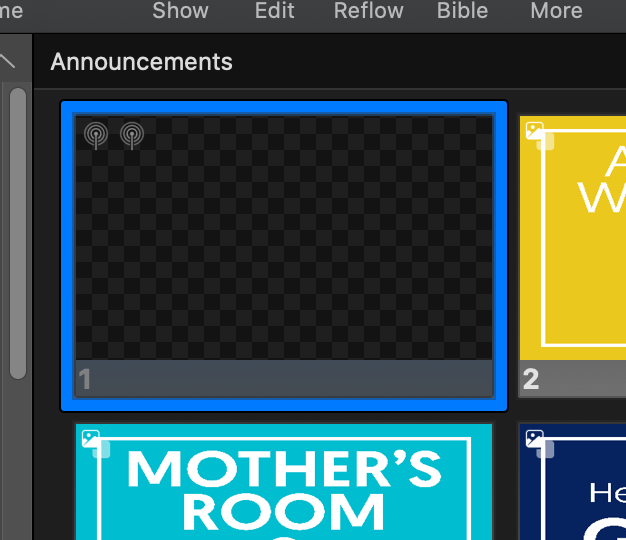
You will see two MIDI cues on your disabled slide. These will trigger the audio bin and your music to begin playlist every time you click on this slide. Since you have disabled it, it won’t run every time the presentation loops. If you are using the automatic Slideshow Timer, clicking this slide will begin the timer, so your audio will play for a few seconds before your slides are shown. If you are using the Go To Next Timer for your slides, add a timer of 1 second to this slide so that it automatically advances after the MIDI cues have triggered.
Okay, I know what you may be thinking… this seems like a lot of steps! BUT, once it is set up, then the step of applying a midi cue to trigger your audio playlist is rather simple from week to week! Setting up the midi functionality is the longer portion, using it week to week is the simple part!

.png)
.avif)
Stay Updated with Our Newsletter
Get the latest news, updates, and exclusive offers delivered straight to your inbox.

Questions?
Browse our FAQs or our Knowledge base that we’ve made to answer your questions. Need additional help? Connect with a support team agent!